
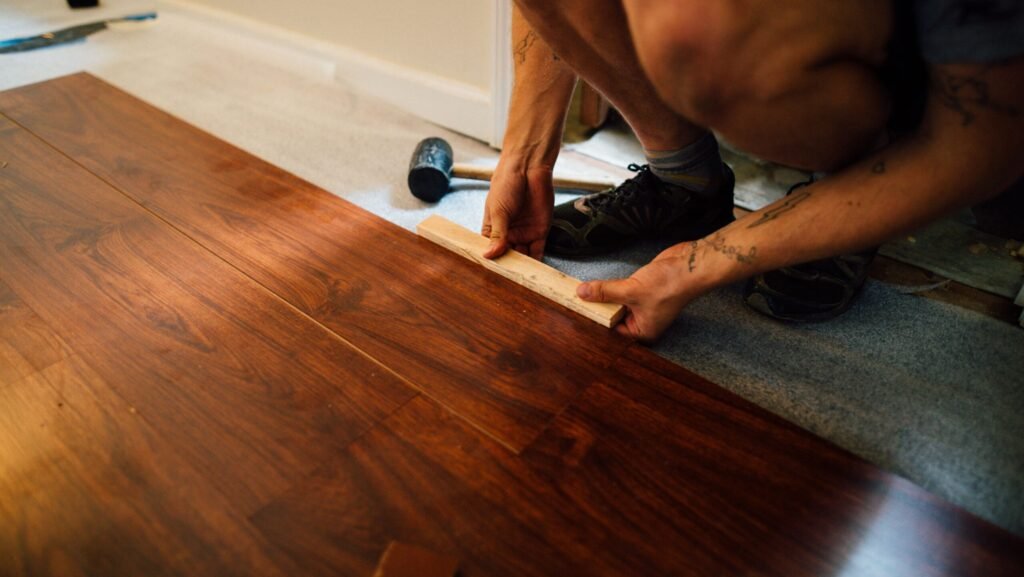
If you are planning to replace a floor, the installation itself may take anywhere from a few hours to several days. The complete project can take longer once you include moving furniture, removing the old flooring, repairing the subfloor, allowing materials to condition to the room when required, installing trim, and waiting for adhesives or finishes to cure.
Most residential flooring installations take one to three working days, but the full project may take two days to more than a week. A professional may install click-lock vinyl plank or laminate in a small, prepared room in four to eight hours, while several connected rooms commonly take two to four days. Tile may require three to seven days when layout, setting, grouting, and curing are included. Unfinished hardwood can take a week or longer because it must be installed, sanded, stained if desired, and finished with drying time between coats.
That distinction matters. A contractor may call a bedroom a “one-day installation,” meaning the new flooring can be laid in one day on a clean, flat, ready subfloor. If the job first requires removing glue-down carpet, pulling hundreds of staples, repairing water damage, and correcting a low spot near the doorway, that one-day floor has acquired a social calendar.
For planning, think in three layers: installation time, preparation time, and return-to-service time. A fast click-lock floor can still become a multi-day project if the old floor is difficult to remove or the subfloor needs repair. Tile, glue-down flooring, and site-finished wood also carry built-in waiting periods for setting, adhesive, grout, stain, or finish. DIY work usually takes longer because layout, cuts, and troubleshooting happen while the installer is learning the system.
Flooring Installation Timeline at a Glance
These are practical planning ranges, not manufacturer guarantees. They assume an average residential project and can change substantially with room condition, crew size, installation method, and product requirements.
| Flooring type | Typical installation time | Typical complete project time |
| Click-lock luxury vinyl plank or rigid-core flooring | 4–8 hours for a small room; 1–3 days for several rooms | 1–4 days |
| Laminate flooring | 4–8 hours for a small room; 1–3 days for several rooms | 1–4 days |
| Sheet vinyl | Several hours to 1 day per room | 1–3 days |
| Glue-down luxury vinyl tile or plank | 1–2 days | 2–4 days including adhesive restrictions |
| Carpet | 4–8 hours for one room; 1–2 days for several rooms | 1–3 days |
| Prefinished engineered hardwood | 1–3 days | 2–7 days, depending on conditioning and installation method |
| Prefinished solid hardwood | 2–5 days | Several days to more than a week, including conditioning |
| Unfinished hardwood | 3–7 days for installation, sanding, and coating | 1–2 weeks or longer |
| Ceramic or porcelain tile | 2–5 days | 3–7 days or longer, including setting and grouting |
| Natural stone tile | 3–7 days or longer | Often 4–10 days because preparation and sealing may be required |
The “complete project” begins when the room is taken out of normal use and ends when the floor can accept the intended foot traffic and furniture. Material delivery or special-order waiting time is not included.
What Is Included in Flooring Installation Time?
People often picture installation as opening boxes and putting the new material on the floor. That is only the middle of the job. Depending on the flooring system, a complete project may include:
1. Delivering and inspecting the flooring, then conditioning it when required
2. Moving furniture and appliances and removing trim that is in the way
3. Removing and disposing of the old flooring, fasteners, or adhesive
4. Inspecting and correcting subfloor damage, moisture, squeaks, or flatness problems
5. Installing approved underlayment or moisture-control materials when required
6. Planning the layout and establishing a straight starting line
7. Cutting and installing the flooring
8. Installing transitions and trim and making necessary door adjustments
9. Reinstalling appliances or plumbing fixtures when the floor is ready
10. Allowing adhesives, mortar, grout, stain, or finish to reach the required service stage before normal traffic and furniture return
An estimate that counts only cutting and laying the flooring can sound wonderfully fast. It is also nearly useless when the room needs demolition, subfloor work, trim, or curing around it.
How Long Does Flooring Take to Install by Material?
Luxury Vinyl Plank and Rigid-Core Flooring
Click-lock luxury vinyl plank, commonly called LVP, and rigid-core flooring are among the fastest choices for a straightforward DIY project. The planks connect to one another and usually float over the subfloor rather than being fastened to it.
An experienced installer may complete a basic bedroom in four to eight hours. A first-time DIYer may need a full day or longer once trim, transitions, and unexpected room conditions are included. Closets, angled walls, doorways, floor vents, and plumbing penetrations add cuts and fitting time.
Do not assume that all vinyl flooring must sit in the room for a fixed number of days. Some products require acclimation, while others do not when specified jobsite conditions are met. Shaw, for example, states that acclimation is not required for certain luxury vinyl flooring installed in an appropriately climate-controlled environment. The instructions for the exact product control the job.
Glue-down vinyl is different from a floating click-lock floor. The subfloor generally needs more careful surface preparation, adhesive must be spread correctly, and traffic or furniture may be restricted while the adhesive develops strength. That can extend a one-day installation into a two- to four-day project.
Laminate Flooring
Laminate is also relatively quick because many products use a floating click-lock system. A square or rectangular bedroom may take an experienced installer four to eight hours. A DIY beginner may need one to two days, especially if the first several rows must be taken apart and reassembled while learning how the locking joints engage.
The first rows set the direction for the rest of the floor. If they are not straight and properly spaced, the error grows as the installation crosses the room. Spending extra time on layout is faster than discovering near the opposite wall that the last row will be a crooked strip barely wide enough to hold together.
Acclimation requirements vary. Some laminate manufacturers require conditioning; others say it is unnecessary when the site meets stated temperature and humidity conditions. Follow the instructions packaged with the product rather than a general internet rule.
Carpet
A professional carpet crew can often install carpet and pad in one average room within several hours. Several bedrooms may be completed in one day, while a whole-house installation may take one to three days.
DIY carpet installation is possible, but wall-to-wall stretch-in carpet is less beginner-friendly than it appears. Correct installation may require a power stretcher, knee kicker, seam tools, tack strip work, and accurate trimming. Poor stretching can lead to wrinkles or loose areas later. Patterned carpet and rooms that require seams take longer because the pieces must be aligned carefully.
The schedule also increases when old carpet has many staples, tack strips are damaged, pet contamination has affected the subfloor, or stairs are included.
Prefinished Hardwood Flooring
Prefinished hardwood arrives with the surface finish already applied, which saves substantial time compared with unfinished wood. Depending on the product, it may be nailed, stapled, glued, floated, or locked together.
A small room may take one to three days to install. A larger connected area may take three to seven days. Solid nail-down hardwood generally progresses more slowly than floating engineered flooring because each board must be positioned and mechanically fastened.
Wood conditioning must be based on the product, the building environment, and moisture conditions—not simply on a universal 48- or 72-hour countdown. The National Wood Flooring Association describes acclimation more accurately as conditioning the wood flooring so it is compatible with the environment where it will be installed. Some hardwood may require several days or longer. Moisture readings and the manufacturer’s instructions are more meaningful than the number of days the cartons have been sitting in the house.
Unfinished Hardwood Flooring
Unfinished hardwood has the longest schedule among common residential flooring choices. After installation, the floor must be sanded. Stain may be applied, followed by sealer and finish coats. Each product has its own drying, recoating, ventilation, foot-traffic, and furniture-replacement requirements.
A modest project may take a week. Larger areas or slower-curing finish systems may require two weeks or longer before the room is fully back in service. Weather and indoor humidity can also affect drying.
Do not schedule furniture delivery based only on the day the last finish coat is applied. “Dry to the touch,” “ready for light foot traffic,” and “ready for rugs and furniture” may be three different points on the product instructions.
Ceramic and Porcelain Tile
Tile is not normally a one-day floor. Even a small room often requires separate periods for preparation, layout, tile setting, grouting, and curing.
A simple bathroom or entry may take two to four working days. A kitchen, large room, diagonal pattern, mosaic, or large-format tile installation may take four to seven days or longer. If the subfloor needs reinforcement, flattening, an uncoupling membrane, or waterproofing, the project can take additional days before the first tile is set.
For many conventional tile installations, the tile-setting mortar is allowed to harden before grouting. MAPEI notes that many installations can be grouted about 24 hours after the tile is installed, although the exact wait depends on the setting material and conditions. Grout then needs its own protected curing period. Rapid-setting products can shorten the schedule, but they also provide less working time and are not automatically the easiest choice for a beginner.
Tile layout deserves time. A few minutes with a tape measure and layout lines can prevent a highly visible sliver of tile along a wall, tub, or doorway. Dry-laying enough pieces to check the pattern is not wasted time.
Natural Stone Tile
Natural stone frequently takes longer than ceramic or porcelain tile. Pieces may vary in thickness, color, and size. Some stone requires sealing before grouting, and some products need special mortar or handling to avoid staining or discoloration.
A small stone floor may require three to five working days, while a larger or detailed project may take a week or more. Product selection, substrate preparation, and sealing instructions should be settled before installation day.
Sheet Vinyl
Sheet vinyl can sometimes be installed in a day, but the large sheet is unforgiving. Cutting around corners and obstacles without damaging the material takes skill. Seams, pattern matching, adhesive, and subfloor irregularities can increase the timeline.
Because sheet vinyl is thin, imperfections below it may telegraph through the finished surface. Additional floor preparation can take longer than installing the visible flooring.
The Subfloor: Where Fast Projects Go to Slow Down
The subfloor is the structural surface below the finished flooring. Underlayment is a separate layer that may be installed above the subfloor for a particular flooring system. They are not interchangeable terms, and a thin foam underlayment does not repair a damaged or badly uneven subfloor.
Before covering the subfloor, check for:
- Loose, squeaking, or damaged panels
- High seams or protruding fasteners
- Low spots and humps
- Water damage or soft areas
- Cracks in concrete
- Excess moisture
- Old adhesive or residue
- Contamination from pets or plumbing leaks
- Movement or deflection that may be unsuitable for tile
A floor does not have to be perfectly level for every product, but it normally must be sufficiently flat within the flooring manufacturer’s stated tolerance. “Level” means horizontal. “Flat” means free from excessive humps and dips. A room can slope and still be flat; it can also appear level while containing a dip that causes click-lock joints to move and separate.
Do not try to correct every problem with extra foam. Underlayment is not a magic carpet. High areas may need approved mechanical correction, low areas may need a compatible patch or leveling product, loose wood panels may need fastening, and moisture problems must be identified rather than trapped beneath a new floor.
Subfloor work may add a few hours for minor fastening and patching, one or two days for more extensive flattening, or considerably longer if water damage, structural movement, or moisture intrusion must be repaired.
Preparation Before Flooring Installation
Measure and Order Enough Material
Measure the room and include closets, alcoves, and connected areas. Flooring is normally ordered with extra material for cuts, defects, layout, and future repairs. The appropriate waste allowance depends on the material, room, pattern, plank or tile size, and manufacturer guidance.
Running short near the end creates more than a shopping trip. A different production lot may vary slightly in color or appearance, and a special-order product may not arrive for weeks.
Inspect the Material
Confirm that the cartons contain the correct product, color, size, and quantity. Inspect for visible damage and compare production or dye-lot information when applicable. Do not install material you already suspect is incorrect. Installation is an expensive way to make a return impossible.
Stabilize the Home and Follow Product-Specific Conditioning
Complete wet construction work and address leaks before bringing moisture-sensitive flooring into the space. Operate heating or air-conditioning as required so the room is within the flooring manufacturer’s permitted temperature and humidity range. Then follow the exact conditioning instructions for the product. Hardwood, laminate, and vinyl can have very different requirements: some need time in the installation area, some specify sealed cartons or moisture measurements, and some require no acclimation when jobsite conditions are already correct.
Empty the Room
Move furniture, rugs, electronics, wall decorations, and breakable items. Decide in advance who will move heavy appliances and whether plumbing, gas, or electrical disconnection is involved.
A refrigerator with a water line, a gas range, a dishwasher, or a toilet is not simply another chair. If a licensed trade is required by local rules or the work exceeds your ability, include that appointment in the schedule.
Plan Baseboards, Doors, and Transitions
Decide whether baseboards will remain, be removed, or be paired with shoe molding. Check door clearance after accounting for the new flooring and underlayment thickness. Identify transitions where the new floor meets carpet, tile, exterior doors, or flooring of another height.
Waiting until the final row to discover that the correct transition was never ordered is a classic flooring-project ending, but it does not have to be yours.
How Much Time Does Old-Floor Removal Add?
Removal may take less than an hour for a simple floating floor or consume a full day or more per room when material is glued, nailed, layered, or difficult to access.
- Loose-lay floating floor: Often relatively quick to disconnect and remove
- Carpet and pad: Commonly a few hours, but staples and tack strips add time
- Sheet vinyl: May be difficult if fully adhered
- Glue-down vinyl or wood: Often labor-intensive and may require mechanical scraping
- Ceramic tile: Slow, noisy, dusty work that may also damage the underlayment below
- Nail-down hardwood: Usually time-consuming because each section is fastened
Disposal also matters. Flooring is bulky and heavy. Tile rubble can exceed the practical capacity of ordinary household trash containers.
A Safety Warning About Older Flooring
Some older resilient floor tile, sheet-flooring backing, and flooring adhesives contain asbestos. EPA guidance warns that disturbing asbestos-containing material can release fibers, and aggressive removal methods can increase the chance of exposure.
If older flooring or black adhesive is suspicious, do not sand, grind, drill, or aggressively scrape it simply to see what is underneath. Stop and arrange appropriate evaluation before disturbing it. State and local rules can add requirements beyond federal guidance.
What Else Can Extend the Schedule?
Room Size and Number of Installers
Square footage matters, but room shape and crew size often matter just as much. Two installers in a clear 400-square-foot rectangle may work faster than one installer in a 150-square-foot room with six doors, a closet, cabinets, and crooked walls.
Layout and Pattern
Straight plank layouts are generally faster than diagonal, herringbone, border, or inlay patterns. Mosaics and products with strong visual variation take more planning, and continuous flooring through several rooms requires careful layout so the rows stay aligned.
Cuts and Obstacles
Door jambs, vents, pipes, islands, toilets, fireplaces, stairs, and built-ins all add measuring and cutting. Stairs are especially slow because every tread, riser, and nosing piece must be fitted individually.
Installation Method
Floating click-lock systems are often faster than nail-down, staple-down, glue-down, mortar-set, or site-finished floors. The slower methods add fastening, adhesive, setting, finishing, or curing steps that cannot simply be rushed.
Material Size
Very long planks can be awkward in small rooms. Large-format tile covers area quickly but demands a sufficiently flat substrate and careful mortar coverage, while mosaics add alignment and grout-joint work.
Installer Experience
Professionals already know how to establish layout lines, correct the first rows, plan transitions, and make repeatable cuts. A DIYer is doing the work while also making those decisions for the first time, so the schedule should leave room for learning and corrections.
For a first flooring installation, allow substantially more time than an experienced crew would need, especially if you are working alone, have limited tool experience, or can work only in short evening or weekend sessions.
Installer Experience
A professional already knows how to establish layout lines, correct the first rows, plan transitions, and make repeatable cuts. A DIYer must perform the work and make the decisions while learning. That is not a reason to avoid the project; it is a reason to allow realistic time.
For a first flooring installation, doubling the professional labor estimate is often a sensible planning allowance. Add more time if you are working alone, have limited tool experience, or can only work in short evening sessions.
Example Flooring Project Schedules
Example 1: Click-Lock Vinyl in a 12-by-12-Foot Bedroom
Professional schedule:
- Clear room and remove simple floating floor: 1–2 hours
- Minor subfloor preparation and layout: 1–2 hours
- Install new flooring: 3–5 hours
- Install trim and transition: 1–2 hours
The room may be completed in one working day if the subfloor is ready and the product has no additional conditioning requirement.
First-time DIY schedule:
- Day 1: Remove old flooring, pull fasteners, inspect and prepare subfloor
- Day 2: Plan layout and install most or all flooring
- Day 3, if needed: Complete doorway cuts, transition, trim, and cleanup
Example 2: Ceramic Tile in a Small Bathroom
- Day 1: Remove old flooring and prepare or reinforce the substrate
- Day 2: Complete layout and set tile
- Day 3: Allow setting material to harden, then grout when permitted
- Day 4 or later: Allow grout to cure as directed and reinstall fixtures when permitted
Waterproofing, extensive flattening, complicated cuts, or a custom pattern can add one or more days.
Example 3: Prefinished Hardwood Through Several Rooms
- Before installation: Stabilize the home, deliver material, and condition or test it as required
- Day 1: Remove old flooring and begin subfloor preparation
- Day 2: Finish preparation and establish layout
- Days 3–5: Install hardwood
- Day 6: Complete transitions, trim, door adjustments, and cleanup
This schedule could be shorter with a larger crew or longer with nail-down flooring, extensive repairs, occupied rooms, or complex transitions.
Ways to Complete Flooring Installation More Efficiently
Once the preparation decisions are settled, the best time savings come from organization and avoiding rework, not from skipping steps.
- Read the exact installation instructions before delivery day and confirm that the flooring is approved for the room, subfloor, and installation method.
- Have the required underlayment, moisture-control product, adhesive, fasteners, trim, and transitions on site before the old floor comes apart.
- Plan the first and last rows, doorways, and transitions before making permanent cuts.
- Set up a nearby cutting station, control dust, and keep spare blades and frequently used tools within reach.
- Mix planks or tiles from multiple cartons when the manufacturer recommends it.
Do not rush adhesive open times, mortar setting, grout curing, or wood-finish drying. Those are product-performance requirements, not installer coffee breaks.
Common DIY Mistakes That Add Time
Starting Without a Layout
Starting against the nearest wall without checking the layout can create a narrow last row, a misaligned doorway, or a visibly crooked installation. Measure first and establish reliable reference lines.
Ignoring Expansion Space
Floating and wood floors commonly require expansion space at walls and fixed objects. The required gap varies by product and installation size, so use the manufacturer’s instructions and keep trim fasteners out of the floating floor.
Installing Over a Bad Subfloor
New flooring does not correct the surface beneath it. Covering movement, moisture, humps, damaged panels, or an unsuitable tile substrate can lead to noise, broken joints, cracked tile, hollow areas, or premature failure.
Using the Wrong Underlayment
More padding is not automatically better. An unapproved or overly soft underlayment can allow excessive movement and damage locking joints. Use only an underlayment approved for the flooring and application.
Cutting Several Pieces Before Testing One
Walls are not always parallel, corners are not always square, and repeated cuts based on an untested measurement can produce an impressive pile of identical mistakes. Cut and test the first piece before duplicating it.
Returning Furniture Too Soon
Heavy furniture, rolling loads, rugs, or wet cleaning may be restricted after glue-down flooring, tile, grout, or site-finished hardwood. Follow the product’s return-to-service instructions rather than judging readiness by touch alone.
Should You Hire a Professional or Install Flooring Yourself?
DIY installation is most reasonable when:
- The room is small and uncomplicated
- The subfloor is dry, sound, and acceptably flat
- The product is designed for straightforward floating installation
- You can safely use the required cutting tools
- You have enough time to work carefully
- A mistake will not disrupt the only kitchen, bathroom, or exit in the home
Professional installation deserves serious consideration when:
- The project involves stairs
- The flooring is nail-down or glue-down hardwood
- Tile requires structural or substrate work
- The subfloor has moisture or significant flatness problems
- The layout includes large connected areas or intricate patterns
- Sheet vinyl requires difficult seams
- Old materials may contain asbestos
- Plumbing, gas, or electrical work is involved
- The product warranty requires particular procedures or qualified installation
Professional installation is not automatically problem-free, but experience usually shortens the work and reduces expensive learning mistakes. If hiring an installer, ask whether the estimate includes removal, disposal, furniture, appliances, baseboards, transitions, door trimming, subfloor preparation, and return visits after curing. “Installation included” can describe a very short list.
Related Articles
If you are updating your home or planning a renovation project, these related guides may also help:
- How Long Does It Take to Tile a Floor?
- How Long Does It Take to Install a Light Fixture?
- How Long Does It Take to Paint a Room?
- How Long Does It Take to Pressure Wash a House?
- How Long Does It Take to Install Blinds or Curtains?
Frequently Asked Questions
Can flooring be installed in one day?
Yes. A professional may install carpet, laminate, sheet vinyl, or click-lock vinyl in one uncomplicated room in a day when the subfloor is ready and the product does not require extended conditioning, adhesive curing, or major trim work.
What flooring is easiest for a beginner?
Click-lock vinyl or laminate in a simple rectangular room is often among the more approachable DIY options. “Easy” still requires subfloor preparation, layout, expansion spacing, accurate cuts, and the exact product instructions.
Does new flooring have to acclimate for 48 hours?
No universal 48-hour rule applies. Requirements vary by product. Current Shaw guidance, for example, says its vinyl and laminate products do not require acclimation when the stated jobsite conditions are met, while wood flooring may require conditioning based on moisture and environmental conditions.
Can new flooring be installed over old flooring?
Sometimes. The new flooring manufacturer must permit the existing surface, and that surface still needs to be sound, clean, sufficiently flat, and compatible with the installation method. Added height also must not interfere with doors, appliances, cabinets, stairs, or transitions.
Can you walk on new flooring immediately?
It depends on the flooring system. Many floating floors can accept careful foot traffic after installation, while glue-down flooring, tile, grout, and site-finished hardwood may have restricted traffic until the relevant products reach their stated service time.
Does the room need to be empty?
Usually. Installers need clear access for removal, layout, cutting, and installation. Moving furniture from one side of the room to the other slows the work and can make a continuous installation difficult.
Do baseboards have to be removed?
Not always. Some installations leave baseboards in place and cover the required perimeter gap with shoe molding or quarter-round. Other projects remove and reinstall or replace the baseboards. Decide before installation so the material and labor are included.
What special tools are needed?
Tools depend on the floor. A floating floor may require spacers, a tapping block, pull bar, saws, and manufacturer-approved blades. Tile adds layout, cutting, mortar, troweling, spacing, and grouting tools, while carpet and hardwood may require specialized stretching or fastening equipment.
Quick Summary
Most flooring installations take one to three working days, but the complete project can run from a single day to well over a week depending on the material and what the room needs before installation begins. Click-lock vinyl, laminate, and professional carpet work are often quickest in a prepared room. Tile, glue-down systems, hardwood, and site-finished floors add more preparation, fitting, fastening, or curing.
The condition of the subfloor often matters more than square footage. Moisture, damage, humps, dips, old adhesive, and structural movement have to be addressed before the finished floor covers them. Conditioning also varies by product, so a universal 48-hour acclimation rule should not be applied to every wood, laminate, or vinyl floor.
A realistic schedule should include the parts that happen around installation: delivery, room preparation, old-floor removal, subfloor work, layout, trim, transitions, and return-to-service time. Good planning makes the job faster; skipping preparation usually just moves the lost time to the repair stage.
Sources & References
- National Wood Flooring Association: Wood Flooring Installation Guidelines
- Tile Council of North America: Industry Standards and Installation Resources
- MAPEI: Tile Installation Basics
- Shaw Floors: Vinyl Flooring Installation
- Shaw Floors: Laminate Flooring Installation
- Bruce: Hardwood Installation Instructions and Warranty Information
- U.S. Environmental Protection Agency: Learn About Asbestos
- U.S. Environmental Protection Agency: Protect Your Family From Asbestos Exposure
Editorial Review
Reviewed by Claire Bennett, Managing Editor
Last reviewed: October 2026
Quick Answer Guide publishes practical, research-based answers to common questions about money, technology, health, travel, home improvement, and everyday life. Content is reviewed using government resources, professional trade organizations, manufacturer installation instructions, industry publications, and other authoritative sources when appropriate. Articles are updated periodically to improve accuracy, clarity, and usefulness.