
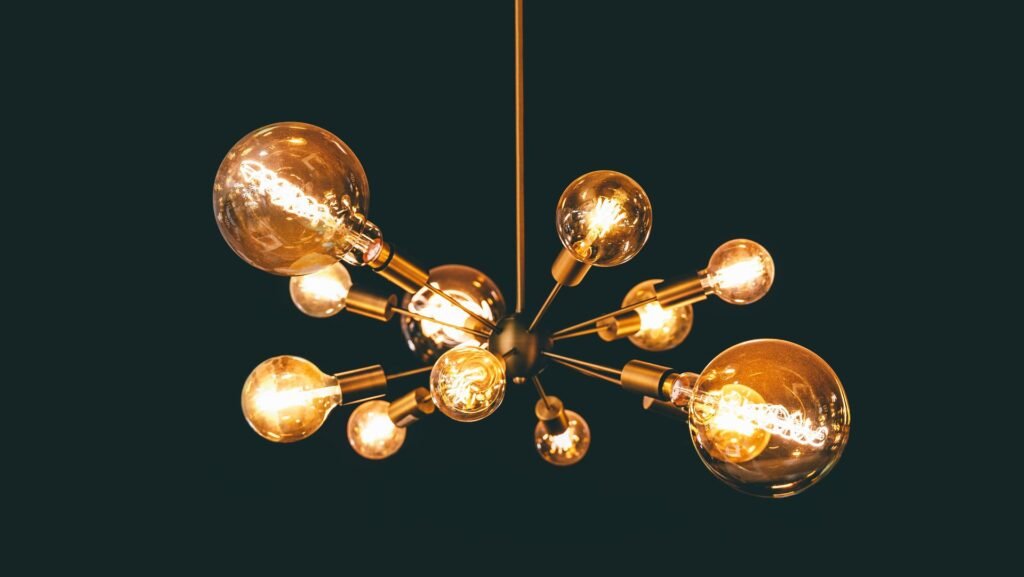
Many homeowners replace light fixtures to update a room’s appearance, improve lighting, or install more energy-efficient fixtures. While replacing an existing ceiling light can often be completed in less than an hour, installing a new light fixture may take considerably longer if electrical wiring, ceiling boxes, switches, or structural support need to be added or upgraded. The total installation time depends on the type of fixture, the condition of the existing electrical system, ceiling height, and whether the work is completed by a homeowner or a licensed electrician.
Quick Answer
Installing a light fixture usually takes 30 minutes to 3 hours, depending on whether you are replacing an existing fixture or installing a new one. Simple replacements that use existing wiring and an existing electrical box are often completed in less than an hour, while new installations, heavy fixtures such as chandeliers, or projects requiring new wiring or electrical upgrades may take several hours. Many homeowners can replace a basic light fixture themselves, but complex electrical work is often best left to a licensed electrician.
Average Light Fixture Installation Time
Typical light fixture installation timelines include:
- Replacing an existing fixture: 30 minutes to 1 hour
- Installing a ceiling fan with lighting: Several hours
- New wiring or electrical box installation: Additional time may apply
- Large chandeliers or specialty fixtures: Sometimes longer
Simple fixture replacements often install much faster than brand-new electrical setups.
What Can Delay Light Fixture Installation?
Typical light fixture installation timelines include:
- Replacing an existing flush-mount light fixture: 30 minutes to 1 hour
- Installing a pendant light: 1 to 2 hours
- Installing a vanity light: 1 to 2 hours
- Installing a wall sconce: 1 to 2 hours
- Installing track lighting: 2 to 4 hours
- Installing recessed lighting: 2 to 6 hours (depending on the number of fixtures and attic access)
- Installing a ceiling fan with a light kit: 2 to 4 hours
- Installing a large chandelier or specialty fixture: 2 to 6 hours
- Installing a new electrical box: Add 30 minutes to 2 hours
- Running new electrical wiring: Add 1 to 4 hours or longer
- Installing a completely new light fixture location: 3 to 8 hours, depending on wiring and ceiling access
Simple fixture replacements using an existing electrical box and wiring often take less than an hour. Projects that require new wiring, ceiling modifications, or structural support generally take considerably longer.
What Can Delay Light Fixture Installation?
Several factors may slow down light fixture installation, from electrical repairs to assembling large fixtures. Identifying these issues before work begins can help reduce delays and ensure the installation is completed safely.
Electrical Work
Installing a new light fixture may require additional electrical work before it can be safely connected. Depending on the existing wiring, installers may need to:
- replace damaged or outdated wiring
- install or replace a junction box
- install or replace dimmer switches
- update three-way switches
- install smart switches
- connect smart lighting features
- test electrical circuits before restoring power
Projects involving new electrical wiring or switch upgrades generally take longer than simple fixture replacements.
Smart Lighting Setup
Many modern light fixtures include smart features that require additional setup after installation. Connecting the fixture to a Wi-Fi or Bluetooth network, downloading a mobile app, pairing voice assistants such as Amazon Alexa or Google Assistant, and installing firmware updates may add extra time before the system is fully operational.
Electrical Box Issues
The existing electrical box must be properly secured and rated for the weight of the new fixture. Installation may take longer if the box:
- is missing
- is damaged
- is installed in the wrong location
- is not rated to support the new fixture
Some heavy fixtures may also require additional ceiling support before installation can continue.
Ceiling Height and Fixture Size
High ceilings and oversized light fixtures often require more time to install. Additional ladders, scaffolding, or specialized equipment may be needed, and large chandeliers or other heavy fixtures frequently require two people to safely lift and secure them.
Old Wiring Problems
Older homes sometimes contain electrical systems that require repairs before a new fixture can be installed safely. Common issues include:
- knob-and-tube wiring
- aluminum wiring
- damaged or deteriorated wiring
- loose or improperly connected wires
Correcting these problems helps ensure the fixture operates safely and complies with current electrical standards.
Fixture Assembly
Some light fixtures require considerable assembly before they can be mounted. Crystal chandeliers, pendant lights with multiple components, and fixtures with several glass globes or decorative pieces often take longer to assemble than simple flush-mount fixtures.
Heavy Fixtures
Heavy light fixtures may require reinforced mounting hardware or additional structural support. Installers may need to add support braces or replace the existing electrical box with one that is rated to safely support the fixture’s weight before installation can be completed.
How to Install a Light Fixture Faster
A little preparation before installation can help the project go more smoothly and reduce unexpected delays. Before work begins, make sure the new fixture is compatible with the existing electrical box and that all necessary tools and hardware are readily available.
You may help speed up installation by:
- turning off the power at the circuit breaker before beginning
- verifying the power is off with a voltage tester
- clearing furniture and other obstacles from the work area
- choosing a light fixture that is compatible with the existing electrical box
- checking that the ceiling box can safely support the new fixture
- reading the manufacturer’s installation instructions before starting
- organizing all hardware and tools before installation
- assembling fixture components before climbing the ladder, when possible
- having a second person available to help with large or heavy fixtures
- replacing worn wire connectors or damaged mounting hardware before installation if necessary
Taking a few minutes to prepare the work area and verify that the electrical box, wiring, and hardware are ready before installation can help reduce delays, improve safety, and make the project go more smoothly.
Types of Light Fixtures
Different types of light fixtures require different installation methods and amounts of assembly. The fixture’s size, weight, mounting requirements, and electrical connections all affect how long installation takes.
Flush-Mount Light Fixtures
Flush-mount fixtures attach directly to the ceiling and are among the quickest and easiest light fixtures to install. They are commonly used in bedrooms, hallways, closets, and other rooms with standard ceiling heights.
Semi-Flush Mount Light Fixtures
Semi-flush mount fixtures hang slightly below the ceiling, providing more decorative appeal while remaining relatively simple to install. They are popular in dining rooms, entryways, and bedrooms.
Pendant Lights
Pendant lights hang from the ceiling by a rod, chain, or cord and are often installed over kitchen islands, dining tables, or bars. Installation may take longer because the hanging height and wiring must be carefully adjusted.
Chandeliers
Chandeliers are among the most time-consuming light fixtures to install because they are often large, heavy, and require significant assembly. Some installations also require additional ceiling support or two people to safely lift and secure the fixture.
Vanity Lights
Vanity lights are typically mounted above or beside bathroom mirrors. Installation is often straightforward when replacing an existing fixture, although older wiring or mounting differences may add time.
Wall Sconces
Wall sconces are decorative wall-mounted fixtures commonly used in hallways, bathrooms, bedrooms, and living rooms. Installing a new wall sconce where no wiring exists usually takes considerably longer than replacing an existing fixture.
Track Lighting
Track lighting consists of multiple adjustable light heads mounted along a single track. Proper alignment, assembly, and positioning may require additional installation time compared to standard ceiling fixtures.
Recessed Lighting
Recessed lights are installed inside the ceiling rather than below it. Installation often requires cutting ceiling openings, running electrical wiring, and accessing attic space, making them one of the more time-consuming lighting projects.
LED Panel Lights
LED panel lights provide bright, energy-efficient illumination and are commonly used in kitchens, offices, laundry rooms, and commercial spaces. Installation is usually straightforward when replacing an existing fixture but may require ceiling modifications for some models.
Outdoor Light Fixtures
Outdoor light fixtures must withstand weather exposure and often require weather-resistant electrical boxes, gaskets, and sealed wiring connections. Installation time may increase when replacing damaged exterior wiring or mounting hardware.
Motion Sensor Lights
Motion sensor lights include built-in sensors that automatically activate when movement is detected. After installation, additional time may be needed to adjust the sensor’s detection range, sensitivity, and lighting duration.
Battery-Powered and Rechargeable Light Fixtures
Battery-powered and rechargeable light fixtures have become increasingly popular because they require little or no electrical wiring. Many wall sconces, picture lights, and decorative fixtures use rechargeable LED bulbs or built-in rechargeable batteries that can operate for weeks or even months between charges, depending on usage. Installation is often much faster than traditional hardwired fixtures because mounting the fixture is typically the only work required.
Professional Installation vs. DIY
Many homeowners successfully replace an existing light fixture themselves, especially when the new fixture uses the existing electrical box and wiring. However, projects involving new electrical work, heavy fixtures, or difficult installation conditions are often better suited to a licensed electrician to ensure the installation is completed safely and meets local electrical codes.
DIY Installation May Be Suitable If:
- You are replacing an existing light fixture.
- The existing electrical box is in good condition.
- No new wiring or electrical circuits are required.
- The new fixture is similar in size and weight to the old one.
- You are comfortable working with basic electrical wiring and using common hand tools.
- You turn off the power at the circuit breaker and verify the circuit is not energized before beginning.
Professional Installation Is Often Recommended If:
- A new electrical circuit must be installed.
- The project requires running new wiring through walls or ceilings.
- The fixture will be installed on a very high ceiling.
- The new fixture is unusually heavy and requires additional structural support.
- The electrical panel or circuit breaker requires modification.
- The home has older or damaged wiring that needs repair.
- You are installing smart switches, multiple new fixtures, or other complex lighting systems.
- You are uncertain about the existing wiring or electrical connections.
Electrical Safety
Always turn off power at the circuit breaker before working on any electrical fixture, and verify that the power is off with a non-contact voltage tester before touching any wires. If you discover damaged wiring, signs of overheating, or wiring that does not match the installation instructions, stop the project and consult a qualified electrician before proceeding.
Safety
Safety Tips for Installing a Light Fixture
Working with electricity requires careful preparation and attention to safety. Taking a few simple precautions before beginning the installation can help reduce the risk of electrical shock, equipment damage, or injury.
Turn Off the Circuit Breaker
Always turn off the power to the light fixture at the electrical panel before beginning any work. Do not rely on the wall switch alone, as the circuit may still be energized.
Verify the Power Is Off
After turning off the breaker, use a non-contact voltage tester to confirm that no electricity is present before touching any wires. This extra step helps ensure the circuit has been completely de-energized.
Use the Proper Ladder
Choose a sturdy ladder that allows you to comfortably reach the ceiling without overreaching. Place the ladder on a stable, level surface and maintain three points of contact whenever possible while climbing.
Do Not Exceed the Electrical Box Rating
Every electrical box is designed to support a maximum fixture weight. Installing a light fixture that exceeds the box’s rated capacity may create a safety hazard or cause the fixture to loosen over time.
Properly Support Heavy Fixtures
Large chandeliers and other heavy light fixtures often require reinforced electrical boxes or additional structural support. Never rely solely on the mounting screws if the existing electrical box is not designed to support the fixture’s weight.
Follow the Manufacturer’s Instructions
Installation requirements vary by fixture. Always follow the manufacturer’s instructions for wiring, mounting hardware, bulb types, and weight limits to help ensure safe operation.
Tools You’ll Typically Need
Replacing a light fixture usually requires only a few basic hand tools. Having everything ready before you begin can help the installation go more smoothly and reduce unnecessary trips up and down the ladder.
- Ladder
- Non-contact voltage tester
- Screwdrivers (flat-head and Phillips)
- Wire stripper
- Wire nuts (wire connectors)
- Electrical tape
- Needle-nose or lineman’s pliers
- Power drill (if new mounting holes are needed)
- Stud finder (optional)
- Level
- Safety glasses
- Work gloves
Important: Always use a non-contact voltage tester to verify the power is off before touching any electrical wires. Never rely solely on the wall switch to confirm that a circuit has been de-energized.
Should You Upgrade the Electrical Box?
Not always. If the existing electrical box is securely mounted, in good condition, and properly rated to support the new light fixture, it can often be reused. However, some installations require a new electrical box to safely support the fixture or meet current electrical requirements.
You may need to upgrade the electrical box if:
- The existing box is cracked, damaged, or loose.
- The box is not securely attached to the ceiling or wall framing.
- The new light fixture is heavier than the existing box is designed to support.
- The box is too small for the number of electrical wires and connections.
- Corrosion, water damage, or overheating is present.
- You are relocating the light fixture to a new location.
- The manufacturer specifies a different type of electrical box for the new fixture.
Replacing an electrical box may add additional time to the installation, but using the correct box helps ensure the light fixture is properly supported and operates safely.
Common Installation Mistakes
Avoid these common mistakes when installing a light fixture:
- Failing to turn off the correct circuit breaker before beginning work.
- Not verifying that the power is off with a non-contact voltage tester.
- Making loose wire connections or failing to properly secure wire nuts.
- Connecting wires incorrectly, which may prevent the fixture from operating properly or create a safety hazard.
- Installing a light fixture that is too heavy for the existing electrical box.
- Failing to connect the grounding wire when required.
- Mounting the fixture crooked or failing to level it before tightening the hardware.
- Installing bulbs that exceed the fixture’s maximum recommended wattage or using incompatible bulb types.
- Ignoring the manufacturer’s installation instructions or wiring diagrams.
- Failing to test the fixture before completing the installation and cleaning up.
- Overcrowding the electrical box with too many wire connections.
- Pinching or damaging electrical wires while mounting the fixture.
- Overtightening mounting screws, which can damage the fixture or electrical box.
- Leaving exposed wiring or loose electrical connections inside the electrical box.
LED vs. Incandescent Light Fixtures
The type of light fixture and bulb you choose may affect installation, energy use, and long-term maintenance. While most modern fixtures are designed for LED bulbs or include integrated LED lighting, some older fixtures were originally designed for incandescent bulbs.
LED Light Fixtures
LED light fixtures use significantly less electricity, generate less heat, and typically last much longer than incandescent bulbs. Many newer fixtures include built-in LED modules that never require traditional bulb replacement.
Incandescent Light Fixtures
Incandescent fixtures use traditional light bulbs that produce more heat and consume more electricity. Although many older homes still use incandescent fixtures, homeowners often replace them with LED fixtures to improve energy efficiency and reduce maintenance.
Choosing the Right Bulb
Always use the bulb type and maximum wattage recommended by the light fixture manufacturer. Installing bulbs that exceed the fixture’s rated wattage may create excessive heat and increase the risk of damage or electrical hazards.
Smart Light Setup
Many modern light fixtures include smart features that allow homeowners to control lighting from a smartphone, voice assistant, or home automation system. While the physical installation may only take an hour, connecting and configuring smart features can add additional setup time.
Smart Home Integration
Many smart light fixtures are compatible with popular smart home platforms, including:
- Amazon Alexa
- Google Home
- Apple Home
After installation, homeowners may need to connect the fixture to their home Wi-Fi network, pair it with the manufacturer’s mobile app, and complete the initial setup before voice controls and automation features become available.
App Setup
Some smart lighting systems require creating an account, downloading a mobile app, installing firmware updates, and customizing schedules, brightness levels, or lighting scenes. Homes with weak Wi-Fi signals or multiple smart devices may require additional setup time.
Although smart lighting may take a little longer to configure, many homeowners appreciate the convenience of controlling lights remotely, setting schedules, and integrating lighting with other smart home devices.
Consider Future Maintenance
Before installing or purchasing a new fixture, think about how you will maintain it over the years. A decorative light fixture that is difficult to reach may require a tall ladder or professional cleaning whenever bulbs need replacing or the fixture collects dust. Choosing a fixture that is easier to access and maintain can save time and money over its lifespan. This is especially important for fixtures installed on vaulted ceilings, stairwells, entryways, and other hard-to-reach locations where routine maintenance may require specialized equipment.
Related Articles
If you’re planning additional home improvement projects, these related guides may also help answer your questions:
- How Long Does It Take to Install a Ceiling Fan?
- How Long Does It Take to Install Blinds or Curtains?
- How Long Does It Take to Paint a Room?
- How Long Does It Take to Install Flooring?
- How Long Does It Take to Assemble Furniture?
Frequently Asked Questions
Why does light fixture installation take so long?
Electrical work, old wiring repairs, and fixture assembly may increase installation time.
Does replacing an old fixture take less time?
Usually yes. Existing wiring and ceiling boxes often simplify installation.
Can old wiring delay installation?
Yes. Damaged or outdated wiring may require repairs or upgrades.
Do heavy fixtures need special support?
Yes. Large chandeliers and ceiling fans often require reinforced electrical boxes.
Should power be turned off before installation?
Yes. Electrical power should always be disconnected before working on fixtures.
Are All Light Fixtures Hardwired?
No. While many ceiling lights, chandeliers, and vanity lights are hardwired into a home’s electrical system, some modern light fixtures operate using rechargeable batteries or rechargeable LED bulbs. These fixtures are popular for accent lighting, rental properties, and locations where running new electrical wiring would be difficult or expensive.
Can I replace a light fixture myself?
Many homeowners can replace an existing light fixture if the existing wiring and electrical box are in good condition. Always turn off the power at the circuit breaker and verify the circuit is de-energized before beginning.
How long does an electrician take to install a light fixture?
Replacing an existing light fixture often takes 30 minutes to 1 hour. More complex installations involving new wiring, high ceilings, or heavy fixtures may take several hours.
Can I replace fluorescent lights with LED fixtures?
Yes. Many homeowners replace older fluorescent fixtures with modern LED fixtures. Depending on the fixture type, minor electrical or mounting modifications may be required.
Can I install LED light fixtures?
Yes. Most modern homes can accommodate LED light fixtures, although you should always follow the manufacturer’s installation instructions and use compatible dimmers and switches when required.
Do I need a junction box?
Yes. Electrical connections should be made inside an approved electrical box designed for the installation. Never leave wire connections exposed.
Can I install a dimmer switch at the same time?
Yes. Many homeowners install a dimmer switch when replacing a light fixture. Be sure both the fixture and bulbs are compatible with dimming.
Do I need a permit to replace a light fixture?
Permit requirements vary by location. Simple fixture replacements often do not require a permit, while installing new wiring or circuits may.
Can I reuse the old mounting bracket?
Sometimes. Many new fixtures include a mounting bracket designed specifically for that fixture. Using the supplied hardware is generally recommended.
Should I replace old wiring?
Not always. If the existing wiring is damaged, deteriorated, or no longer meets current safety requirements, it should be repaired or replaced before installing a new fixture.
Can I install a light fixture where one didn’t exist before?
Yes, but installing a new light fixture location often requires running new electrical wiring, installing an electrical box, and possibly adding a new switch. This type of project usually takes significantly longer than replacing an existing fixture.
Do all light fixtures use the same wiring?
Most residential light fixtures use similar wiring connections, but wiring configurations can vary depending on the fixture, switch setup, and age of the home’s electrical system. Always follow the manufacturer’s instructions.
How long do LED light fixtures typically last?
Many LED light fixtures are designed to last 15,000 to 50,000 hours or more, depending on the product and usage.
Can battery-powered or rechargeable light fixtures replace hardwired fixtures?
Sometimes. Rechargeable and battery-powered fixtures work well for accent lighting, wall sconces, closets, and other locations where running new wiring is impractical. However, they may not provide the same brightness or continuous operation as permanently wired fixtures.
Are smart light fixtures difficult to set up?
Most smart light fixtures are relatively easy to configure after installation. Depending on the model, setup may include connecting to Wi-Fi, downloading a mobile app, installing firmware updates, and pairing with a smart home system.
Can I install a light fixture on a sloped ceiling?
Yes. Some fixtures are specifically designed for vaulted or sloped ceilings, while others require special mounting hardware or adapters.
How often should light fixtures be cleaned?
Most light fixtures benefit from dusting several times a year and occasional deep cleaning to remove dirt from shades, globes, and decorative components. Always turn off the power and allow bulbs to cool before cleaning.
Quick Summary
Installing a light fixture typically takes 30 minutes to 3 hours, although projects involving new wiring, electrical box replacement, high ceilings, or heavy fixtures may require additional time. Most homeowners can replace a basic light fixture using existing wiring and an existing electrical box, while more complex electrical work is often best handled by a licensed electrician. Preparing the work area, turning off power at the circuit breaker, verifying the power is off, and using the proper tools can help improve both safety and efficiency. Choosing the right fixture, following the manufacturer’s instructions, and considering future maintenance needs can also help ensure a successful installation.
Sources & References
- National Electrical Code (NEC)
- Major light fixture manufacturer installation guides (for installation procedures)
- Major home improvement retailer installation guides
Editorial Review
Reviewed by Claire Bennett
Managing Editor, Quick Answer Guide
Last reviewed: July 2026
Quick Answer Guide publishes practical, research-based answers to common questions about money, technology, health, travel, home improvement, and everyday life. Content is reviewed using official government resources, educational institutions, industry publications, and other authoritative sources when appropriate. Articles are updated periodically to improve accuracy and usefulness.