
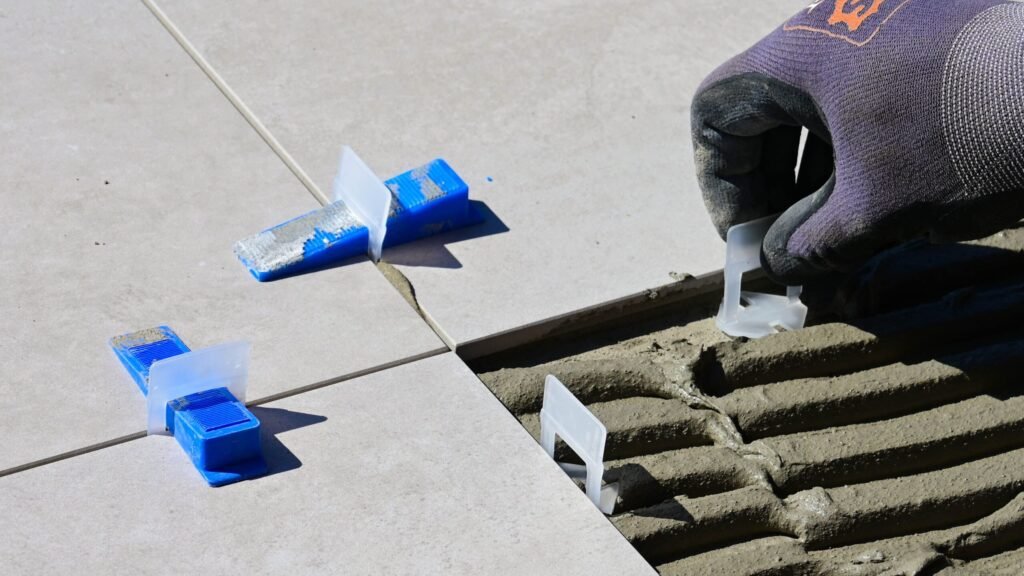
Many homeowners wonder how long it takes to tile a floor when remodeling a bathroom, kitchen, laundry room, entryway, or other living space. While a small room with a simple tile pattern may be completed in a day or two, larger projects often take several days once floor preparation, tile installation, grouting, and curing time are included. The total time depends on the room size, the type and size of tile, the condition of the subfloor, the layout pattern, and whether the project is completed by a professional installer or as a DIY renovation.
Quick Answer
Tiling a floor usually takes 1 to 5 days for most residential projects, although larger rooms, custom tile layouts, natural stone, or projects requiring extensive floor preparation may take longer. Simple installations using standard ceramic or porcelain tile often move quickly, while removing existing flooring, repairing the subfloor, installing underlayment, cutting intricate patterns, grouting, and allowing proper curing time can significantly increase the overall project timeline. Whether the work is completed by a professional installer or a homeowner also affects how long the project takes.
Average Floor Tiling Time
Typical residential floor tiling timelines include:
- Small bathroom or laundry room: 1 to 2 days
- Kitchen floor: 2 to 4 days
- Medium or large living areas: 3 to 5 days
- Open-concept or whole-home flooring: Several days to a week or longer
- Replacing an existing tile floor: Additional time for demolition and floor preparation
- Installing over a prepared subfloor: Often faster than removing old flooring first
- Custom patterns or detailed layouts: Additional installation time may apply
- Natural stone tile: Often requires more installation time
- Large-format tile: Installation may take longer because of careful leveling and alignment
- Mosaic tile: Usually requires additional labor because of the larger number of pieces and grout lines
- Grouting: Usually completed the same day or the following day, depending on the installation
- Grout drying and curing: Additional time is required before heavy use or moving furniture back into the room
Simple ceramic or porcelain tile installed in a straightforward pattern often takes less time than intricate layouts, natural stone installations, or projects requiring extensive floor preparation. Although laying the tile itself may only take a day or two, homeowners should also allow time for the adhesive and grout to cure before returning the room to normal use.
What Can Delay Floor Tiling?
Several factors may increase the amount of time required to complete a floor tiling project. While laying the tile is often the most visible part of the job, preparation, layout, cutting, and curing frequently account for a significant portion of the overall installation time.
Floor Preparation
Preparing the floor is one of the most important steps of a successful tile installation. Before tile can be installed, contractors may need to:
- remove existing flooring
- remove old adhesive or mortar
- clean the subfloor thoroughly
- level uneven surfaces
- repair damaged or squeaky subfloors
- fill cracks or low spots
- perform moisture testing when appropriate
- install cement backer board or another approved underlayment
- apply waterproofing membranes in wet areas
- allow repair materials to dry before continuing
Skipping proper floor preparation may lead to cracked tile, loose tiles, or grout failure later.
Demolition and Cleanup
Removing old flooring can add considerable time to a project. Existing ceramic tile, vinyl, laminate, hardwood, carpet, or multiple layers of flooring may all require different removal methods. Hauling away debris and thoroughly cleaning the work area must also be completed before new tile can be installed.
Tile Layout and Planning
Careful planning helps produce a professional-looking finished floor. Installers often spend time determining the best starting point, balancing tile cuts along walls, checking room dimensions, and confirming the placement of transition strips, thresholds, and expansion joints before installation begins.
Complex Tile Patterns
Intricate layouts often require significantly more labor than a simple straight pattern. Installations using diagonal layouts, herringbone patterns, mosaics, borders, medallions, or custom designs usually require additional measuring, cutting, and alignment.
Tile Material and Size
Different tile materials and sizes install differently. Large-format porcelain tiles require very flat floors and careful leveling, while small mosaic tiles involve placing many more individual pieces and grouting additional joints. Natural stone tiles may also require sealing before or after installation, depending on the material.
Cutting Around Obstacles
Rooms with numerous corners, cabinets, kitchen islands, doorways, floor vents, toilets, plumbing pipes, or other obstacles often require additional measuring and precision cutting, increasing installation time.
Heated Floor Systems
Installing a radiant floor heating system beneath the tile adds additional preparation and testing before the tile can be installed. Heating mats or cables must be positioned correctly and, in many cases, tested before and after installation.
Drying and Curing Time
Even after all the tiles have been installed, the project is not yet complete. Thinset mortar and grout require adequate drying and curing time before the floor can support normal foot traffic, heavy furniture, or appliances. Rushing this process may affect the quality and durability of the finished installation.
Weather and Temperature
Temperature and humidity can influence how quickly mortar, grout, leveling compounds, and waterproofing products cure. Extremely cold, hot, or humid conditions may slow installation or require additional curing time.
Material Availability
Special-order tile, decorative trim pieces, transition strips, matching grout colors, or backordered materials may delay installation before work even begins. Ordering all materials well in advance can help reduce scheduling delays.
How to Tile a Floor Faster
A little preparation before installation begins can help keep a tiling project on schedule. While adhesive and grout still require adequate drying and curing time, homeowners can often reduce unnecessary delays by planning ahead and ensuring the work area is ready before the first tile is laid.
You may help speed up the project by:
- selecting your tile, grout color, and trim pieces well before installation
- measuring the room carefully and confirming material quantities before ordering
- ordering extra tile to allow for cuts, breakage, and future repairs
- clearing furniture, appliances, and personal belongings from the work area beforehand
- removing baseboards or trim in advance if appropriate
- choosing a simple tile layout instead of intricate patterns when possible
- confirming that all tile, grout, mortar, underlayment, and installation materials have arrived before work begins
- repairing subfloor damage before installation day whenever possible
- maintaining proper room temperature and humidity to promote normal curing
- limiting foot traffic until the adhesive and grout have fully cured
- verifying that all special-order tile, trim pieces, transitions, and grout have been delivered before installation begins
Planning ahead helps installers work more efficiently while reducing interruptions caused by missing materials, unexpected repairs, or last-minute design changes.
Types of Floor Tile
Different types of floor tile vary in appearance, durability, installation methods, and maintenance requirements. Some materials install relatively quickly, while others require additional preparation, sealing, or specialized installation techniques. Choosing the right tile depends on the room, your budget, your design preferences, and how much foot traffic the floor will receive.
Ceramic Tile
Ceramic tile is one of the most popular flooring materials for residential homes. It is available in a wide variety of colors, sizes, and styles, making it a common choice for kitchens, bathrooms, and laundry rooms. Ceramic tile is generally easier to cut and install than many natural stone products, making it a popular option for both professionals and experienced DIY homeowners.
Porcelain Tile
Porcelain tile is denser and less porous than ceramic tile, making it highly resistant to moisture, stains, and heavy wear. Because porcelain is harder to cut, installation may take longer and often requires specialized cutting equipment. It is an excellent choice for high-traffic areas and rooms exposed to moisture.
Natural Stone Tile
Natural stone tiles offer unique colors and patterns that cannot be duplicated by manufactured products. Because every piece is different, installers often spend additional time arranging the layout for the most attractive appearance. Some natural stone products also require sealing before or after installation.
Marble Tile
Marble creates an elegant, upscale appearance but typically requires more careful installation and ongoing maintenance than ceramic or porcelain tile. It is softer than porcelain and may require sealing to help protect against stains and moisture.
Slate Tile
Slate is a durable natural stone commonly used in both indoor and outdoor applications. Its textured surface provides excellent slip resistance, although the uneven surface may require additional attention during installation and grouting.
Travertine Tile
Travertine is another popular natural stone known for its warm, earthy appearance. Because it naturally contains small holes and variations, installers may spend additional time filling, sealing, and carefully aligning the tiles during installation.
Quarry Tile
Quarry tile is an unglazed clay tile commonly used in commercial kitchens, entryways, patios, and other high-traffic areas. It is extremely durable and slip-resistant, although its thicker construction may require additional effort during cutting and installation.
Glass Tile
Glass tile is most often used for decorative accents, backsplashes, and walls rather than large floor areas. Specialized installation materials and careful handling are usually required to prevent damage during installation.
Mosaic Tile
Mosaic tile consists of many small tiles attached to mesh sheets. Although the sheets simplify placement, installers often spend additional time aligning the sheets, cutting around obstacles, and grouting the numerous joints.
Large-Format Tile
Large-format tiles create a clean, modern appearance with fewer grout lines. However, they require an exceptionally flat subfloor, precise leveling, and careful handling because even minor unevenness can become noticeable after installation.
Tile Sizes, Shapes, and Layouts
Tile size can have a significant impact on how long a floor installation takes. Larger tiles cover more area with fewer pieces, while smaller tiles require more placement, alignment, and grouting. However, larger tiles also demand a flatter subfloor and more precise installation to achieve a professional-looking finish.
Common Tile Sizes
Homeowners often choose tile based on its size and appearance as much as its material. Tile size and shape can affect installation time, the number of cuts required, grout lines, and the overall look of the finished floor.
Mosaic Tile
Mosaic tile typically consists of many small tiles attached to mesh sheets. Although the sheets help speed placement, installers often spend additional time aligning the sheets, cutting around obstacles, and grouting the numerous joints. Mosaic tile is commonly used in bathrooms, showers, and decorative floor accents.
12 × 12 Tile
For many years, 12 × 12-inch tile was one of the most common residential flooring sizes. It remains a popular choice because it balances ease of handling with relatively straightforward installation and works well in a wide variety of room sizes.
12 × 24 Tile
12 × 24-inch tile has become one of the most popular choices for residential flooring because it creates a modern appearance with fewer grout lines than traditional square tile. It is commonly used in kitchens, bathrooms, hallways, and open living areas. Although fewer tiles are needed to cover the floor, installers must carefully align each tile and ensure the subfloor is flat to minimize uneven edges, which may increase installation time.
24 × 24 Tile
Large 24 × 24-inch tiles create a modern appearance with fewer grout lines, making many rooms appear larger. Although fewer tiles are needed to cover the floor, installers must carefully level each tile and ensure the subfloor is sufficiently flat to prevent uneven edges, sometimes increasing installation time.
Large-format tile
Large-format tile generally refers to tiles larger than 15 inches on one side, with many modern styles measuring 12 × 24, 24 × 24, 24 × 48, or even larger. These tiles provide a clean, contemporary appearance with minimal grout lines but require precise floor preparation, specialized installation techniques, and careful handling because of their size and weight.
Choosing the Right Tile
Choosing the right floor tile involves more than selecting a color or style. Different rooms have different levels of moisture, foot traffic, and maintenance needs, so the best tile for one area of the home may not be the best choice for another.
Bathroom
Bathrooms are exposed to frequent moisture and humidity, making porcelain and ceramic tile popular choices. Textured or slip-resistant finishes may provide better traction on wet floors.
Kitchen
Kitchen floors experience heavy foot traffic, spills, and dropped cookware. Durable porcelain and ceramic tile are common choices because they resist stains, moisture, and everyday wear while remaining relatively easy to clean.
Laundry Room
Laundry rooms are susceptible to water leaks, humidity, and heavy appliances. Moisture-resistant tile with durable grout helps protect the floor while providing long-lasting performance.
Basement
Basements may experience higher moisture levels than other parts of the home. Porcelain tile is often recommended because it resists moisture and temperature changes better than many other flooring materials. Proper moisture testing and subfloor preparation are especially important before installation.
Entryway and Mudroom
Entryways are among the busiest areas of a home and are exposed to dirt, rain, mud, and heavy foot traffic. Durable, slip-resistant tile can help withstand daily wear while making cleanup easier.
Indoor vs Outdoor Tile
Not all floor tile is designed for both indoor and outdoor use. While some porcelain and natural stone tiles perform well in a variety of environments, others are intended only for interior spaces.
Indoor Tile
Indoor floor tile is designed for areas such as kitchens, bathrooms, laundry rooms, hallways, and living spaces. Homeowners often choose ceramic or porcelain tile for its durability, ease of maintenance, and wide range of styles.
Outdoor Tile
Outdoor tile is exposed to rain, moisture, sunlight, dirt, and changing weather conditions. Choose tile that is specifically rated for exterior use and has a slip-resistant surface to help improve traction when the floor is wet. Using indoor-only tile outdoors may create a slippery walking surface when wet and may reduce the long-term performance of the installation. Always verify that the tile is rated for exterior use before installation.
Types of Tile Patterns
The tile pattern you choose affects both the appearance of the finished floor and the time required for installation. While simple layouts are generally quicker to install, decorative patterns often require additional planning, cutting, and careful alignment, which can increase labor time and material waste.
Straight Lay
Straight lay is the most common floor tile pattern. Tiles are installed in straight rows and columns, making it one of the quickest and easiest layouts for both professionals and experienced DIY homeowners.
Brick or Running Bond
Running bond, sometimes called a brick pattern, staggers each row of tile to create a classic appearance. This layout is popular with rectangular tiles, including many wood-look and subway-style tiles. It requires slightly more planning than a straight lay but remains one of the most common installation patterns.
Diagonal
Diagonal installations place the tile at a 45-degree angle to the walls. This pattern can make a room appear larger but usually requires additional cutting around the perimeter, increasing installation time.
Herringbone
Herringbone uses rectangular tiles arranged at right angles to create a distinctive zigzag pattern. It requires careful planning, frequent cuts, and precise alignment, making it more labor-intensive than simpler layouts.
Basket Weave
Basket weave patterns create the appearance of woven strips using rectangular or square tiles. Maintaining a consistent pattern throughout the room requires additional layout time and attention to detail.
Pinwheel
Pinwheel layouts combine large and small tiles in a repeating design. The varying tile sizes require additional planning and careful placement to maintain a uniform appearance throughout the room.
Versailles Pattern
Also known as a French pattern, the Versailles layout combines several tile sizes in a repeating arrangement. It creates a distinctive, high-end appearance but requires careful planning and additional time because of the multiple tile sizes involved.
Checkerboard
Checkerboard layouts alternate two tile colors to create a timeless design. Although the installation itself is relatively straightforward, careful alignment is needed to maintain an even, balanced appearance.
Simple patterns generally install faster and create less material waste than decorative layouts. Homeowners choosing intricate designs should expect additional labor, cutting, and installation time.
Professional Installation vs. DIY
Many homeowners choose to install floor tile themselves, especially in smaller rooms with simple layouts. However, larger projects, natural stone, and complex patterns often require specialized tools and experience. The right choice depends on the size of the project, the type of tile, the condition of the subfloor, and your comfort level with measuring, cutting, and setting tile.
DIY Installation May Be Suitable If:
- You are tiling a small room, such as a bathroom or laundry room.
- You are installing a simple straight-lay pattern.
- You are using ceramic tile or another DIY-friendly material.
- The subfloor is flat, level, and in good condition.
- You have experience using tile saws and other basic installation tools.
- You have enough time to complete the project without rushing.
- You carefully follow the manufacturer’s installation instructions
Professional Installation Is Often Recommended If:
- You are tiling large rooms or an entire home.
- You are installing natural stone, marble, or other specialty tile.
- The project includes heated flooring systems.
- Waterproofing membranes are required in wet areas.
- The subfloor requires significant leveling or repair.
- You are installing intricate patterns such as herringbone, pinwheel, or Versailles.
- Large-format tile requires specialized leveling systems.
- You are unfamiliar with tile installation or do not have the necessary tools.
Professional installers also have experience planning layouts, minimizing waste, and addressing unexpected issues that may arise during installation. While many homeowners successfully complete smaller tile projects themselves, hiring a professional may save time and help ensure a durable, long-lasting installation.
Safety Tips
Floor tiling involves cutting tile, mixing mortar, lifting heavy materials, and working on your hands and knees for extended periods. Taking a few basic safety precautions can help reduce the risk of injury and make the project more comfortable.
Wear Safety Glasses
Safety glasses help protect your eyes from flying tile chips, dust, and debris when cutting or drilling tile.
Use a Dust Mask or Respirator
Cutting tile, mixing dry mortar, and removing old flooring can create dust. Wearing an appropriate dust mask or respirator helps reduce the amount of dust you breathe during the project.
Wear Knee Pads
Installing floor tile often requires kneeling for long periods. Quality knee pads can improve comfort and help reduce strain on your knees.
Use Hearing Protection
Wet saws, grinders, and other power tools can be noisy. Hearing protection helps reduce the risk of hearing damage during extended use.
Practice Wet Saw Safety
Always follow the manufacturer’s instructions when using a wet tile saw. Keep your hands clear of the blade, allow the saw to reach full speed before cutting, and avoid forcing the tile through the blade. Make sure electrical cords remain away from standing water and use the saw on a stable surface.
Lift Tile Safely
Boxes of tile, bags of mortar, and large-format tiles can be surprisingly heavy. Lift with your legs instead of your back, avoid twisting while carrying heavy materials, and ask for help when moving large or oversized tiles.
Keep the Work Area Safe
Keep tools, extension cords, buckets, and loose materials organized to help prevent trips and falls. Clean up excess mortar, water, and tile fragments as you work to reduce slipping hazards.
Tools You’ll Typically Need
Having the right tools before you begin can make a floor tiling project safer, easier, and more accurate. While some specialized tools can be rented, many of the basic tools are commonly used for both DIY and professional tile installations.
- Tape measure for measuring the room and planning the tile layout.
- Chalk line for marking straight reference lines before installation.
- Tile cutter for making straight cuts on many ceramic and porcelain tiles.
- Wet tile saw for cutting porcelain, natural stone, large-format tile, and intricate shapes.
- Notched trowel for spreading mortar evenly and creating proper adhesive coverage.
- Tile spacers for maintaining consistent grout joints.
- Rubber mallet for gently tapping tiles into place without damaging them.
- Level for checking that tiles are flat and properly aligned.
- Mixing bucket for preparing thinset mortar or grout.
- Clean water buckets because you’ll go through a surprising amount of water while grouting and cleaning.
- Drill with mixing paddle for thoroughly mixing mortar and grout to the proper consistency.
- Grout float for forcing grout into the joints between tiles.
- Large sponge for cleaning excess grout from the tile surface during grouting.
- Knee pads for comfort during extended periods of kneeling.
Having all necessary tools available before installation begins can help reduce delays and allow the project to progress more smoothly.
Should You Remove Old Flooring First?
In many cases, yes. Removing the existing flooring allows installers to inspect the subfloor, repair any damage, and create a solid, level surface for the new tile. Proper preparation helps improve the durability of the finished floor and reduces the risk of cracked tiles or grout problems later.
However, not every tile installation requires complete floor removal. In some situations, tile can be installed over certain existing flooring materials if the surface is clean, stable, properly bonded, and meets the tile manufacturer’s installation requirements.
Flooring That Is Often Removed
Installers commonly remove:
- Carpet and padding
- Laminate flooring
- Floating floors
- Damaged vinyl flooring
- Loose ceramic or porcelain tile
- Hardwood flooring that is unsuitable for tile installation
- Old adhesive or flooring residue
Removing these materials provides a better foundation for the new tile and allows any hidden subfloor problems to be repaired before installation begins.
When Tile May Be Installed Over Existing Flooring
In some situations, new tile may be installed over:
- Existing ceramic or porcelain tile that is firmly bonded
- Properly prepared concrete floors
- Some vinyl flooring that meets manufacturer requirements
Before installing over an existing floor, installers should verify that the surface is level, structurally sound, clean, and free of loose or damaged areas.
Why Removal Often Saves Time Later
Although removing old flooring adds time at the beginning of the project, it often helps prevent future problems such as loose tiles, cracked grout, uneven floors, or poor adhesion. Starting with a properly prepared subfloor gives the new tile the best chance of lasting for many years.
Should You Seal Tile?
Whether a tile floor needs to be sealed depends on the type of tile being installed. Some tile materials naturally resist moisture and stains, while others are porous and benefit from a protective sealer. Following the manufacturer’s recommendations helps protect the floor and extend its appearance.
Ceramic Tile
Most glazed ceramic tile does not require sealing because the glazed surface already provides protection against moisture and stains. However, grout joints may still benefit from a grout sealer, depending on the grout product used.
Porcelain Tile
Most glazed porcelain tile also does not require sealing. Some unglazed porcelain products may benefit from sealing if recommended by the manufacturer, but many porcelain tiles are naturally dense and highly resistant to moisture.
Natural Stone
Natural stone, including marble, slate, travertine, limestone, and some granite, is generally more porous than ceramic or porcelain tile. Many natural stone floors should be sealed to help reduce staining and moisture absorption. Some stone surfaces may also require periodic resealing to maintain their protection.
Grout
Even when the tile itself does not require sealing, cement-based grout often benefits from a grout sealer. Sealing grout can help reduce staining, moisture penetration, and mildew growth while making routine cleaning easier.
Follow the Manufacturer’s Recommendations
Not all tile products require the same care. Always follow the manufacturer’s installation, sealing, and maintenance instructions to determine whether sealing is recommended and how often it should be repeated.
Common Installation Mistakes
Even experienced DIY homeowners can make mistakes that affect the appearance, durability, and longevity of a tile floor. Taking time to plan the installation carefully and following the manufacturer’s instructions can help prevent costly repairs later.
Poor Layout Planning
Failing to plan the tile layout before installation may result in narrow tile strips along walls, uneven borders, or an unbalanced appearance. Dry-fitting several rows of tile before spreading mortar helps create a more attractive finished floor.
Not Leaving Expansion Gaps
Tile expands and contracts slightly with changes in temperature and humidity. Leaving the recommended expansion gaps around walls and other fixed surfaces helps reduce the risk of cracked tile, loose grout, or tenting.
Using the Wrong Trowel
Different tile sizes require different trowel notch sizes to achieve proper mortar coverage. Using the wrong trowel may reduce adhesion and leave unsupported areas beneath the tile.
Applying Mortar Unevenly
Mortar should be spread evenly using the recommended trowel technique. Uneven mortar coverage can create hollow spots, poor adhesion, or tiles that sit at different heights.
Lippage
Lippage occurs when one tile edge sits higher than the adjacent tile, creating an uneven surface. An uneven subfloor, inconsistent mortar thickness, or improper leveling are common causes. Careful installation and frequent checks with a level help reduce lippage.
Walking on the Floor Too Soon
Walking on newly installed tile before the mortar or grout has cured may shift the tiles, weaken the bond, or damage the grout joints. Always follow the manufacturer’s recommended curing times before allowing foot traffic.
Using Too Little Grout
Grout completely fills the joints between tiles and helps support the finished installation. Leaving joints partially filled may reduce durability and allow moisture or debris to collect between the tiles.
Using Too Much Mortar
Applying excessive mortar may cause uneven tile heights, squeeze mortar into grout joints, or make it difficult to achieve proper alignment. Using the correct amount of mortar helps create a flatter, more professional-looking floor.
Failing to Check for Level and Alignment
Regularly checking the tile with a level and straightedge throughout the installation helps identify problems before the mortar hardens. Making small adjustments as you work is much easier than correcting mistakes after the floor has cured.
Drying & Curing Times
Although laying the tile may only take a day or two, the project is not complete until the mortar and grout have properly dried and cured. Allowing adequate curing time helps create a strong bond, reduces the risk of shifting tiles, and improves the long-term durability of the floor.
Thinset Mortar
Thinset mortar begins hardening soon after installation but typically requires about 24 hours before light foot traffic is recommended. Drying time may vary depending on the mortar type, room temperature, humidity, and the size of the tile.
Grout
Grout is usually applied after the mortar has set. Most grout requires approximately 24 to 72 hours to dry sufficiently, although drying times vary by product. During this period, avoid exposing the floor to excessive moisture unless the manufacturer states otherwise.
Walking on the Floor
Light foot traffic is often permitted after about 24 hours, but always follow the manufacturer’s recommendations for the mortar and grout products used during installation.
Moving Furniture Back
Most furniture can usually be returned after 48 to 72 hours, once the mortar and grout have had additional time to cure. To help prevent scratching the new floor, lift heavy furniture instead of dragging it across the tile.
Heavy Appliances
Large appliances such as refrigerators, washing machines, ranges, and dishwashers should generally not be moved back into place until the floor has cured sufficiently to support their weight. Waiting 48 to 72 hours, or longer if recommended by the manufacturer, helps reduce the risk of damaging the new installation.
Full Cure
Although the floor may appear finished within a day or two, complete curing often takes several days to a few weeks, depending on the installation materials. During this time, avoid unnecessary heavy loads, impacts, or excessive moisture to allow the floor to reach its maximum strength.
Tile Maintenance
Proper maintenance helps keep a tile floor looking its best and may extend its lifespan for many years. While most tile floors require relatively little upkeep, regular cleaning and occasional inspections can help identify small problems before they become costly repairs.
Regular Cleaning
Sweep, dust mop, or vacuum the floor regularly to remove dirt and grit that can wear down grout and dull the tile’s appearance. Clean the floor with a manufacturer-recommended tile cleaner or a mild cleaner suitable for the tile material. Avoid abrasive cleaners or tools that may scratch the surface.
Seal Natural Stone When Needed
Many natural stone floors, including marble, slate, travertine, and some granite, benefit from periodic sealing to help reduce staining and moisture absorption. Follow the manufacturer’s recommendations for the appropriate sealer and resealing schedule.
Inspect Grout Lines
Check grout joints periodically for cracks, loose areas, discoloration, or signs of moisture damage. Repairing small grout problems early may help prevent water from reaching the subfloor and causing more extensive damage.
Regrouting When Necessary
Over time, grout may become cracked, worn, or damaged. Removing deteriorated grout and replacing it with new grout can improve the appearance of the floor while helping maintain a strong, moisture-resistant installation.
Replace Cracked or Damaged Tiles
Individual cracked, chipped, or loose tiles should be repaired or replaced as soon as practical. Prompt repairs help prevent additional damage and reduce the chance of moisture reaching the underlying floor structure.
Protect the Floor
Use felt pads beneath furniture legs, place mats at exterior entrances to reduce tracked-in dirt, and avoid dropping heavy objects that could crack or chip the tile. These simple steps can help preserve the floor’s appearance for years.
Heated Floors
Radiant floor heating has become an increasingly popular upgrade in bathrooms, kitchens, and other living spaces. Heating systems are typically installed beneath the tile before the flooring is laid, providing comfortable, even warmth once the installation is complete.
Because the heating system must be carefully positioned, connected, and tested before tile installation begins, heated floors usually require additional preparation and installation time. Installers also verify that the heating system is functioning properly before covering it with mortar and tile.
While radiant floor heating increases the overall project timeline, many homeowners feel the added comfort and evenly distributed warmth make it a worthwhile upgrade, particularly in bathrooms and other areas where tile floors may feel cold underfoot.
Related Articles
If you’re planning a floor tiling project or other home improvement renovations, these related guides may help answer additional questions and prepare you for your next project:
- How Long Does It Take to Install Flooring?
- How Long Does It Take to Install a Dishwasher?
- How Long Does It Take to Paint Kitchen Cabinets?
- How Long Does It Take to Install Light Fixture?
- How Long Does It Take to Install a Water Heater?
Frequently Asked Questions
Why does floor tiling take so long?
Floor preparation, custom tile cuts, and grout drying time may increase installation length.
Can you walk on tile immediately after installation?
Usually no. Adhesive and grout often require several hours or longer to cure.
Does tile size affect installation time?
Yes. Small tiles and detailed patterns often require more labor.
Can uneven floors delay tiling?
Yes. Installers may need to level surfaces before laying tile.
Does grout need time to dry?
Yes. Grout often requires at least 24 hours before heavy use.
Are large rooms slower to tile?
Usually yes. Larger spaces require more cutting, alignment, and installation time.
Why do tile floors sometimes crack?
Cracked tiles may result from subfloor movement, improper installation, heavy impacts, or insufficient mortar coverage. Identifying and correcting the underlying cause helps prevent future damage.
How do I know if my subfloor is ready for tile?
The subfloor should be clean, dry, level, structurally sound, and free of movement before tile installation begins. Any damaged areas should be repaired before laying tile.
Can I install tile in every room of the house?
Tile is suitable for many areas, including kitchens, bathrooms, laundry rooms, entryways, and living spaces. Choosing the appropriate tile for the room and following proper installation methods helps ensure long-lasting performance.
Can floor tile be used on walls?
Usually yes, provided the wall can support the weight and the tile is appropriate for the application. However, wall tile should not always be used on floors because many wall tiles are not designed to withstand foot traffic.
Can you replace a single cracked tile?
Yes. In many cases, a single cracked or damaged tile can be removed and replaced without replacing the entire floor. Keeping several leftover tiles from the original installation makes it much easier to match the existing floor if repairs are needed in the future.
How many extra tiles should I buy?
Most professionals recommend purchasing 5% to 10% extra tile for simple layouts and 10% to 15% for diagonal, herringbone, or other intricate patterns. Extra tile helps account for cuts, breakage, and future repairs.
Why are extra tiles left over after installation?
Installers often order additional tile to allow for cuts, accidental breakage, shade variation between production runs, and future repairs. In some cases, tile is sold only by the box or carton, so homeowners may receive more tile than the project requires. Handcrafted, custom-made, imported, or special-order tile may also have minimum order quantities or long lead times, making it especially important to keep leftover tiles for future repairs. Matching discontinued or custom tile years later can be difficult or even impossible.
Can tile be installed over concrete?
Yes. Tile can often be installed directly over a concrete slab if the surface is clean, dry, level, and free of major cracks or damage. Any moisture problems or structural issues should be corrected before installation begins.
What is tile lippage?
Tile lippage occurs when one tile sits slightly higher than the tile next to it, creating an uneven edge. Minor lippage may occur naturally with some tile products, but excessive lippage can result from an uneven subfloor, improper installation, or inadequate leveling.
Quick Summary
Most floor tiling projects take 1 to 5 days, although larger rooms, complex layouts, natural stone, extensive floor preparation, and drying or curing times may extend the project. Choosing the right tile, preparing the subfloor properly, using the correct installation materials, and allowing adequate curing time all contribute to a durable, long-lasting floor. Whether you hire a professional or tackle the project yourself, careful planning and patience are key to achieving the best results.
Sources & References
- Tile Council of North America (TCNA). TCNA Handbook for Ceramic, Glass, and Stone Tile Installation.
- National Tile Contractors Association (NTCA). Installation standards, technical resources, and best practices for professional tile installation.
- Schluter Systems. Installation guides for underlayments, waterproofing systems, uncoupling membranes, and tile installation products.
- Daltile. Installation and care guides for ceramic, porcelain, natural stone, and specialty tile.
- The Home Depot. DIY flooring installation and tile project resources.
- Manufacturer installation instructions for tile, thinset mortar, grout, sealers, and underlayment products used during installation.
Editorial Review
Reviewed by Claire Bennett, Managing Editor
Last reviewed: July 2026
Quick Answer Guide publishes practical, research-based answers to common questions about home improvement, technology, health, money, travel, legal topics, and everyday life. Our editorial content is researched using authoritative sources, including government agencies, educational institutions, professional trade organizations, manufacturer installation guidelines, and other trusted industry resources when appropriate. Articles are reviewed and updated periodically to reflect current best practices, safety recommendations, and industry standards.