
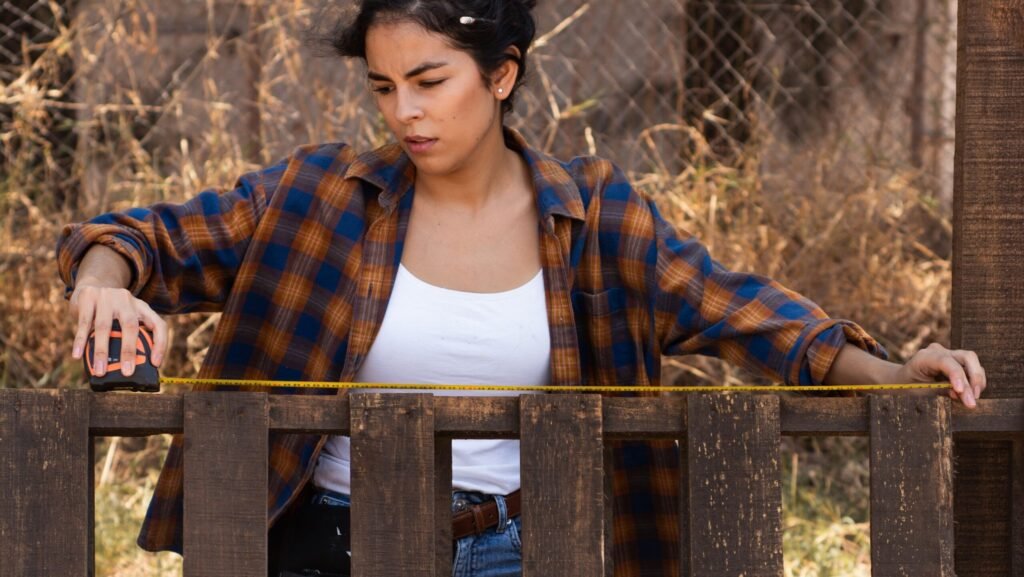
If you’re planning to install a new fence, you may be wondering how long the project will take. Replacing an existing fence is often faster than installing one where no fence previously existed, but every project is different. Fence installation time depends on factors such as the size of the property, the type of fencing material, ground conditions, weather, and whether permits, utility marking, or homeowner association (HOA) approval are required before work can begin. Understanding the installation process can help you plan your project, avoid unnecessary delays, and know what to expect from start to finish.
Quick Answer
Installing a fence typically takes 1 day to several weeks, depending on the size of the project, fence material, property conditions, weather, and local permit requirements. Professional installers can often complete a small residential fence in 1 to 3 days, while larger properties, custom fence designs, difficult terrain, or permit delays may extend the project to several weeks. First-time fence installations and projects that require property surveys, underground utility marking, or extensive site preparation generally take longer than replacing an existing fence.
Average Fence Installation Time
Typical fence installation timelines include:
- Small residential fences: 1 to 3 days
- Large property fences: Several days to weeks
- Custom or decorative fences: Additional installation time may apply
- Permit approvals and inspections: Extra delays possible
Simple chain-link fences often install faster than wood, vinyl, or masonry fences.
Typical Fence Installation Timeline
| Fence Type | Typical Time |
| Chain link | 1 to 2 days |
| Wood privacy | 2 to 4 days |
| Vinyl | 2 to 5 days |
| Aluminum | 2 to 5 days |
| Wrought iron | Several days |
| Masonry | One to several weeks |
What Happens During Fence Installation?
Although every fence installation is different, most projects follow a similar sequence of steps. While some smaller residential fences can be completed in a day or two, larger or more complex installations require additional preparation before construction can begin. Understanding each stage of the process helps explain why fence installation timelines can vary so much.
Step 1: Property Measurements
Before any work begins, the property is measured to determine the exact fence layout. Installers identify property boundaries, measure the total fence length, locate gate openings, and note changes in elevation or obstacles such as trees, landscaping, or existing structures. Accurate measurements help ensure the correct amount of fencing material is ordered and reduce the likelihood of costly mistakes during installation.
Step 2: Permit Approval
Depending on your location, a building permit may be required before construction begins. Some communities also regulate fence height, materials, setbacks, and placement. If you live in a neighborhood governed by a homeowners association (HOA), additional approval may be necessary. Waiting for permits or HOA approval can sometimes take longer than the installation itself.
Step 3: Underground Utility Marking
Before digging any post holes, underground utility lines should be located and marked. Utility companies identify buried gas, electric, water, sewer, cable, and communication lines to help prevent accidental damage during excavation. Because utility companies may require several business days to complete this service, scheduling utility marking early can help prevent project delays.
Step 4: Material Delivery
Once measurements are complete and approvals have been received, fencing materials are delivered to the property. This typically includes fence posts, rails, panels or pickets, gates, hardware, concrete, and any specialty components required for the project. Custom materials or special-order gates may require additional delivery time.
Step 5: Removing the Existing Fence
If an older fence is being replaced, it must first be dismantled and removed. Installers remove fence panels, pull or cut old posts, remove concrete footings when necessary, and dispose of the old materials. Depending on the age and condition of the existing fence, this step may take several hours or even an entire day.
Step 6: Marking Post Locations
After the work area has been cleared, installers carefully mark the location of every fence post. Proper spacing is essential because it affects the strength, appearance, and alignment of the finished fence. Measurements are checked multiple times before digging begins to ensure the fence follows the planned layout.
Step 7: Digging Post Holes
Digging post holes is often one of the most labor-intensive parts of the project. Soil conditions play a major role in how quickly this work can be completed. Rocky ground, clay soil, tree roots, buried debris, or uneven terrain can significantly increase excavation time. Fence posts must also be installed at the proper depth to provide adequate support.
Step 8: Setting Posts in Concrete
Once the holes have been dug, each fence post is positioned, leveled, and secured with concrete. Installers carefully check that every post is straight and properly aligned before the concrete begins to harden. Small adjustments made during this stage help ensure the finished fence remains straight and stable for many years.
Step 9: Allowing the Concrete to Cure
Although fast-setting concrete begins to harden quickly, installers often allow additional time for the posts to stabilize before attaching the fence rails and panels. Waiting for the concrete to cure helps prevent posts from shifting, leaning, or becoming misaligned during the remainder of the installation.
Step 10: Installing Rails
After the fence posts have been secured, horizontal rails are attached between the posts. These rails provide structural support for fence panels or pickets and help keep the fence rigid and properly aligned. The number of rails varies depending on the fence design and material.
Step 11: Installing Pickets or Panels
Next, the visible portion of the fence is installed. Wood fences typically require individual pickets to be attached one at a time, while vinyl, aluminum, and some composite fencing systems often use prefabricated panels that install more quickly. Proper spacing and alignment are important for both appearance and long-term performance.
Step 12: Hanging Gates
Gates are usually installed after the main fence sections have been completed. Installers adjust the hinges, latches, and hardware to ensure the gate opens and closes smoothly without sagging or rubbing against the ground. Larger or double gates often require additional adjustments for proper alignment.
Step 13: Final Inspection
Before the project is considered complete, the entire fence is inspected. Installers verify that the fence is straight, posts are secure, gates operate correctly, and all hardware has been tightened properly. The work area is cleaned, excess materials are removed, and the homeowner has an opportunity to inspect the finished installation before the project is finalized.
Why Installation Times Vary
Although the basic installation process is similar for most fences, every property presents unique challenges. Weather, soil conditions, property size, fence material, terrain, permit requirements, and utility marking can all affect how long each step takes. Understanding the complete process helps explain why one fence may be finished in a single day while another project requires several days or even weeks to complete.
Why Setting Fence Posts Takes So Long
Many homeowners are surprised to learn that setting the fence posts is often the longest and most important part of the installation process. While attaching fence panels or pickets usually goes fairly quickly, properly installing the posts requires careful measuring, digging, leveling, and allowing concrete to cure. Since every other part of the fence depends on the posts being installed correctly, professional installers spend extra time making sure this stage is done right.
Digging the Post Holes
The first step is digging a hole for each fence post. This may sound simple, but soil conditions can make excavation much more difficult than expected. Rocky ground, tree roots, clay soil, buried debris, or old concrete footings may slow progress considerably. Larger properties with dozens of fence posts naturally require much more digging than smaller residential projects.
Installing Posts at the Proper Depth
Fence posts must be installed deep enough to provide long-term stability. If posts are too shallow, the fence may lean, shift, or become unstable over time, especially during high winds or heavy storms. The required depth depends on factors such as the fence height, soil conditions, local building codes, and climate. Taller privacy fences and heavy gates often require deeper post holes than shorter decorative fences.
Setting the Posts in Concrete
After each post is positioned in the hole, concrete is placed around the base to help anchor it securely. Before the concrete begins to harden, installers carefully check that every post is perfectly vertical and aligned with the rest of the fence. Even small adjustments at this stage can have a significant impact on the finished appearance.
Allowing the Concrete to Cure
Although fast-setting concrete begins to harden relatively quickly, installers often allow additional time for the posts to stabilize before attaching fence rails or panels. This waiting period helps prevent the posts from shifting under the weight of the fence. Depending on the type of concrete used, weather conditions, and the manufacturer’s recommendations, curing may require anywhere from several hours to a few days.
Maintaining Proper Alignment
Keeping every fence post perfectly aligned takes patience and precision. Installers frequently use string lines, measuring tools, and levels to verify that each post is positioned correctly before moving on to the next one. A single post that is out of alignment can affect the appearance and structural integrity of the entire fence.
Bracing the Posts
While the concrete cures, installers may temporarily brace fence posts to keep them from moving. These supports help maintain proper alignment until the concrete has gained enough strength to hold the posts securely on its own. Removing the braces too early could allow the posts to shift, resulting in a fence that is no longer straight or level.
The Foundation of a Long-Lasting Fence
Although setting the fence posts may seem like a slow part of the installation process, it is also one of the most important. Strong, properly aligned posts provide the foundation for the entire fence and help it withstand years of weather, daily use, and changing ground conditions. Spending extra time on this stage helps reduce the likelihood of leaning posts, sagging gates, and costly repairs in the future.
How Ground Conditions Affect Fence Installation
One of the biggest factors affecting fence installation time is the condition of the ground itself. While soft, level soil allows installers to dig post holes relatively quickly, difficult terrain can add hours or even days to a project. Every property is different, and conditions below the surface are often impossible to predict until digging begins.
Rocky Soil
Rocky soil is one of the most challenging conditions for fence installation. Large rocks or solid bedrock can make digging post holes slow and labor-intensive, sometimes requiring specialized equipment or alternative installation methods. In some cases, installers must remove rocks individually or relocate post positions slightly while still maintaining the fence’s appearance and structural integrity.
Clay Soil
Clay soil is dense and heavy, making it more difficult to dig than ordinary topsoil. When wet, clay can become sticky and difficult to work with, while dry clay may harden almost like concrete. These conditions often slow excavation and may require additional effort to create properly sized post holes.
Sandy Soil
Although sand is easier to dig than clay or rocky soil, it presents a different challenge. Loose sand may collapse back into the hole before the post can be installed, making it difficult to maintain the proper depth and width. Additional concrete or different installation techniques may be needed to provide adequate support and long-term stability.
Tree Roots
Large tree roots can significantly slow fence installation. Installers may need to carefully cut smaller roots or adjust post locations to avoid damaging larger root systems. In heavily landscaped yards, roots can make digging far more time-consuming than homeowners expect.
Sloped or Uneven Ground
Installing a fence on a hill or uneven terrain requires additional planning and precise measurements. Fence panels may need to be stepped or racked to follow the slope while maintaining an attractive appearance and proper support. Digging post holes on uneven ground also takes more time than working on a level property.
Old Concrete Footings
If you’re replacing an existing fence, installers may discover old concrete footings buried below ground. Removing these footings can be one of the most time-consuming parts of the project, especially if they are large or deeply embedded. In some situations, specialized tools or equipment may be needed to break apart and remove the old concrete before new posts can be installed.
Buried Debris
Older properties sometimes contain hidden obstacles beneath the surface, including bricks, construction debris, large roots, abandoned pipes, old fence posts, or other buried materials. These unexpected discoveries can delay digging and occasionally require changes to the fence layout before installation can continue safely.
Every Property Is Different
Even neighboring homes can have very different ground conditions. One property may have soft, easy-to-dig soil, while the next contains rocks, heavy clay, or extensive tree roots. Because installers cannot always see what lies beneath the surface, unexpected ground conditions are one of the most common reasons fence installation takes longer than originally estimated.
Why Utility Marking Is Important
Before digging the first post hole, it’s essential to know what lies beneath the ground. Underground utility lines are often impossible to see from the surface, and accidentally striking one can be dangerous, expensive, and may significantly delay your fence installation. That’s why utility marking is one of the first steps professional installers complete before excavation begins.
Call 811 Before You Dig
In the United States, homeowners and contractors can contact 811, often called the “Call Before You Dig” service, to request that underground utility lines be located and marked. This free service notifies participating utility companies, which then send technicians to identify the approximate location of buried lines on your property before digging begins.
Gas Lines
Natural gas lines are one of the most important utilities to identify before excavation. Damaging a gas line can create a serious safety hazard, require emergency repairs, and bring the entire project to an immediate stop. Waiting for gas lines to be marked is far safer than risking an accidental strike.
Electrical Lines
Underground electrical cables can present a significant shock hazard if damaged. Striking a buried power line may interrupt electrical service, create dangerous conditions, and require repairs before fence installation can continue.
Water and Sewer Lines
Many properties have underground water supply lines, irrigation systems, or sewer connections that may not be obvious from the surface. Accidentally damaging one of these lines can result in flooding, costly repairs, and unexpected project delays.
Internet, Cable, and Telephone Lines
Communication lines that provide internet, cable television, and telephone service are also commonly buried underground. Although damaging one of these lines may not create the same safety risks as striking a gas or electrical line, repairs can still be expensive and may interrupt service for your home or even your neighborhood.
Underground Sprinkler Systems
Private irrigation systems are generally not marked through the 811 service because they are owned by the homeowner rather than the utility companies. If your property has an underground sprinkler system or landscape lighting, it’s important to identify those lines before digging begins to help prevent accidental damage.
Waiting for Utility Companies
One of the biggest surprises for many homeowners is that utility marking is not immediate. After contacting 811, utility companies typically need several business days to locate and mark underground lines, although the exact timeframe varies by location. During busy construction seasons or after severe weather, the wait may be even longer.
Utility Marking Can Affect the Overall Timeline
For many fence projects, the waiting period for utility marking takes longer than the installation itself. While a professional crew may be able to install a small residential fence in only one or two days, homeowners may spend several days waiting for utilities to be marked before digging can legally and safely begin. Scheduling utility marking early in the planning process is one of the easiest ways to help avoid unnecessary delays.
A Simple Step That Protects Everyone
Utility marking helps protect homeowners, contractors, neighbors, and essential public services. Spending a few days waiting for underground utilities to be identified is far less disruptive than dealing with damaged gas lines, electrical cables, water pipes, or communication systems after excavation has already begun.
How Long Does Concrete Need to Cure?
One of the most important stages of fence installation happens after the fence posts have been set in concrete. Although the posts may appear secure within a short period, the concrete continues to gain strength over time. Allowing the concrete to cure properly helps ensure the fence remains stable, straight, and durable for years to come.
Fast-Setting Concrete
Many professional installers use fast-setting concrete designed specifically for fence posts. These products begin to harden much more quickly than traditional concrete and may allow installers to continue working sooner. Depending on the product and weather conditions, fast-setting concrete may provide enough stability for light construction within a few hours.
Waiting 24 to 48 Hours
Even when fast-setting concrete is used, many installers prefer to wait 24 to 48 hours before placing the full weight of fence rails, panels, or gates on the posts. This extra time allows the concrete to gain additional strength and reduces the chance of the posts shifting during the remainder of the installation.
Standard Concrete Takes Longer
Traditional concrete generally requires a longer curing period. While it may become firm enough to support the posts within a day, it continues to harden for several days. Depending on the concrete mix, weather conditions, and the fence manufacturer’s recommendations, installers may wait longer before completing the fence, particularly for larger or heavier installations.
Weather Can Affect Curing Time
Temperature and moisture play an important role in how quickly concrete cures. Cool weather often slows the curing process, while extremely hot or dry conditions may require additional care to prevent the concrete from drying too quickly. Rain can also affect freshly poured concrete if it occurs before the concrete has had sufficient time to begin hardening.
When Can Fence Panels Be Installed?
The timing depends on the type of concrete, the fence material, and the installer’s recommendations. Some lightweight fence systems may allow panels or rails to be attached the same day when fast-setting concrete is used, while heavier privacy fences, steel fencing, gates, or decorative panels often benefit from additional curing time. Waiting until the posts are firmly anchored helps prevent movement that could affect the fence’s alignment.
Why Patience Matters
It can be tempting to finish the project as quickly as possible, but rushing the installation before the concrete has cured properly may lead to leaning posts, uneven fence sections, or gates that no longer close correctly. Taking the time to allow the concrete to develop adequate strength helps create a fence that remains secure and attractive for many years.
Follow the Manufacturer’s Instructions
Concrete products vary in their setting and curing times, and fence manufacturers may have specific recommendations for when additional weight can safely be placed on the posts. Following both the concrete manufacturer’s instructions and the fence installation guidelines helps ensure a safe, durable, and long-lasting installation.
For many homeowners, a new fence marks the beginning of years of family memories. Some choose to leave their initials or the installation date in a small amount of leftover concrete near a fence post or gate. Like the fence itself, those personal touches often become lasting reminders of the day the project was completed.
Can You Install a Fence Yourself?
Yes, many homeowners successfully install their own fences, especially on smaller properties or when replacing an existing fence. However, fence installation is more physically demanding and technically challenging than many people expect. Success depends on the type of fence, your experience, the tools available, and the conditions on your property.
DIY Fence Installation
Installing a fence yourself can save money on labor costs and allow you to complete the project at your own pace. Smaller projects, such as decorative garden fences or short sections of split rail fencing, are often manageable for experienced DIYers. However, larger privacy fences or installations on uneven terrain typically require much more planning and physical effort.
Skills You’ll Need
Fence installation requires more than simply digging holes and attaching panels. Homeowners should be comfortable measuring accurately, laying out straight fence lines, operating power tools, digging post holes, mixing or placing concrete, and ensuring every post is level and properly aligned. Even small measuring errors can become noticeable over the length of an entire fence.
Tools Required
Installing a fence usually requires a variety of tools, including measuring tapes, string lines, stakes, post-hole diggers or power augers, shovels, levels, wheelbarrows, drills, saws, and concrete mixing equipment. Depending on the fence material, specialty tools may also be needed for stretching chain-link fencing, cutting metal components, or assembling prefabricated panels.
Understanding Property Lines
One of the most important parts of any fence project is making sure the fence is installed on your property. Building even a few inches over a property line can lead to costly disputes with neighbors and, in some cases, require sections of the fence to be removed and rebuilt. If you’re uncertain where your property boundaries are located, it’s best to confirm them before construction begins.
When to Hire a Contractor
Hiring a professional fence contractor is often the best choice for larger projects, difficult terrain, custom fence designs, or installations that require extensive digging and concrete work. Professional crews have the experience, equipment, and knowledge to complete the project efficiently while complying with local building codes and permit requirements.
When to Call a Surveyor
If property boundaries are unclear or neighboring lots have older or missing boundary markers, hiring a licensed land surveyor can provide peace of mind before installation begins. A survey helps verify property lines and reduces the risk of legal disputes after the fence has been completed. The cost of a survey is often much less than the expense of relocating an improperly placed fence.
Know Your Local Requirements
Before starting a DIY fence project, check your local building regulations and homeowner association (HOA) rules. Some communities require permits, limit fence height or materials, or specify setback distances from property lines. You should also contact 811 before digging so underground utility lines can be located and marked.
Is DIY the Right Choice?
Installing a fence yourself can be a rewarding project if you have the necessary skills, tools, and time. However, because every fence depends on properly installed posts, accurate measurements, and careful planning, many homeowners choose to hire professionals for larger or more complex installations. Whether you tackle the project yourself or hire a contractor, taking the time to plan carefully can help ensure your new fence remains attractive, secure, and durable for many years.
Common Fence Installation Mistakes
Installing a fence may seem straightforward, but even small mistakes can lead to costly repairs, property disputes, or a fence that doesn’t last as long as expected. Many installation problems are preventable with careful planning, accurate measurements, and attention to detail before construction begins.
Not Confirming Property Lines
One of the most common and expensive mistakes is building a fence in the wrong location. Assuming an old fence marks the property boundary or relying on estimates instead of official property records can create disputes with neighbors. If property lines are uncertain, having the land surveyed before installation can help avoid legal issues and the expense of relocating the fence later.
Skipping Permits or HOA Approval
Some homeowners begin construction without checking local building codes or homeowner association (HOA) rules. Many communities regulate fence height, materials, setbacks, and placement. Starting work without the required approvals may result in fines, stop-work orders, or even having to remove and rebuild the fence.
Forgetting to Call 811
Digging without having underground utilities marked can be dangerous and expensive. Buried gas, electrical, water, sewer, cable, and communication lines may all lie beneath the proposed fence line. Contacting 811 before digging allows utility companies to mark public underground lines and helps reduce the risk of damaging essential services. Homeowners should also identify private irrigation systems, landscape lighting, or invisible pet fences that typically are not marked through the 811 service.
Setting Posts Too Shallow
Fence posts provide the structural support for the entire fence. If they are not installed deep enough, the fence may lean, wobble, or shift over time, especially during high winds or severe weather. Proper post depth depends on the fence height, soil conditions, local building codes, and climate.
Uneven Post Spacing
Accurate spacing is essential for both appearance and structural integrity. Posts placed too close together or too far apart can make it difficult to install panels correctly and may create visible gaps or uneven sections. Taking the time to measure each post location carefully helps ensure the finished fence looks professional.
Installing Posts Out of Level
Even a slightly crooked post can affect the alignment of every section that follows. Professional installers continually check each post with a level and string line before the concrete hardens. Correcting a post while the concrete is still workable is much easier than trying to fix the problem after it has cured.
Ignoring Drainage
Water drainage is often overlooked during fence installation. Low areas that collect standing water can soften the soil around fence posts over time, increasing the risk of movement or premature deterioration. Considering drainage before installation helps improve the fence’s long-term stability and durability.
Improper Gate Placement
Gates require additional planning because they are opened and closed thousands of times throughout their lifespan. An opening that is too narrow, too wide, or improperly aligned may cause the gate to sag, drag on the ground, or fail to latch correctly. Taking extra time during layout helps ensure smooth operation for years to come.
Using the Wrong Concrete Mix
Not all concrete products are designed for setting fence posts. Using an inappropriate mix or failing to follow the manufacturer’s instructions can reduce the strength of the installation. Choosing a concrete product intended for post installations and mixing it correctly helps provide a stable foundation.
Rushing the Concrete Curing Process
One of the biggest mistakes is attaching rails, panels, or heavy gates before the concrete has developed sufficient strength. Although the posts may appear solid, moving too quickly can cause them to shift out of alignment. Allowing the recommended curing time helps create a stronger, longer-lasting fence.
Failing to Plan Ahead
Many delays and frustrations can be avoided with good preparation. Ordering materials in advance, confirming measurements, clearing the work area, and gathering the necessary tools before installation begins can make the project much smoother from start to finish.
Small Mistakes Can Become Big Problems
A fence is only as strong as its foundation and planning. Taking extra time to verify property lines, follow local regulations, measure carefully, and allow materials to cure properly can help prevent problems that may not become visible until months or even years after the installation is complete. As many experienced installers say, it’s much easier to prevent a mistake than to rebuild a fence.
Ways to Install a Fence Faster
Although some factors, such as weather and permit approvals, are beyond your control, there are several steps homeowners can take to help keep a fence installation project on schedule. Preparing ahead of time allows installers to begin work more quickly and reduces the likelihood of unexpected delays once construction starts.
Confirm Property Boundaries Early
One of the best ways to avoid delays is to verify your property lines before work begins. If there is any uncertainty about the location of the boundary, consider hiring a licensed surveyor before ordering materials or scheduling installation. Resolving property line questions early can prevent costly disputes and unexpected changes once construction is underway.
Schedule Utility Marking in Advance
Contact 811 several business days before digging is scheduled. Utility companies need time to locate and mark underground gas, electric, water, communication, and other public utility lines. Waiting until the last minute to request utility marking can delay the entire project before the first post hole is even dug.
Choose Readily Available Materials
Some fence styles, colors, and specialty gates may need to be special ordered, increasing the overall project timeline. If completing the installation quickly is your priority, ask your contractor about materials that are already in stock or readily available. Standard sizes and common colors often have shorter delivery times than custom products.
Plan Around the Weather
Fence installation generally progresses more smoothly during periods of mild, dry weather. Heavy rain, strong winds, frozen ground, or extreme heat can slow digging, affect concrete curing, and create unsafe working conditions. While the weather cannot be controlled, scheduling the project during favorable conditions may help reduce delays.
Clear the Work Area
Before installers arrive, remove outdoor furniture, lawn decorations, children’s toys, garden hoses, and any other obstacles near the planned fence line. Trimming overgrown vegetation and clearing brush can also improve access and reduce the amount of preparation required before construction begins.
Provide Easy Access
Installers work more efficiently when equipment and materials can be moved easily around the property. Unlock gates, clear driveways if materials will be delivered there, and remove vehicles or other obstacles that could restrict access to the work area. Better access often allows the crew to spend more time installing the fence and less time moving equipment.
Arrange Material Delivery Ahead of Time
Whenever possible, schedule material delivery before installation day so everything is ready when the crew arrives. Waiting for missing posts, panels, gates, or hardware can bring work to a standstill. Confirming that all materials have been delivered before installation begins helps keep the project moving.
Gather the Right Tools
For homeowners installing a fence themselves, having the necessary tools ready before starting can save hours of frustration. Measuring tapes, string lines, levels, post-hole diggers, shovels, drills, saws, wheelbarrows, and concrete supplies should all be available before work begins. Stopping repeatedly to purchase forgotten tools or materials can quickly turn a weekend project into a week-long one.
A Little Preparation Goes a Long Way
Many fence installation delays occur before construction even begins. Confirming property boundaries, requesting utility marking, gathering materials, and preparing the work area ahead of time allows installers to focus on building the fence instead of solving avoidable problems. A few hours of planning before the project starts can often save several days during installation.
Why Fence Projects Get Delayed
While many fence installations are completed on schedule, unexpected delays are fairly common. Some setbacks last only a day or two, while others can postpone a project for several weeks. Understanding the most common causes of delays can help homeowners plan ahead and avoid unnecessary frustration.
Homeowner Association (HOA) Approval
If you live in a neighborhood governed by a homeowners association, fence installation may require approval before construction can begin. HOA guidelines often regulate fence height, materials, colors, styles, and placement. Waiting for an application to be reviewed or making requested changes to the design can delay the project before any work begins.
Material Shortages
Fence installation cannot proceed if essential materials are unavailable. High demand, supply chain disruptions, seasonal shortages, or manufacturer backorders may delay the delivery of fence posts, panels, hardware, or other components. Choosing commonly stocked materials may help reduce the risk of waiting for replacements or additional shipments.
Special-Order Gates and Custom Materials
Custom gates, decorative hardware, specialty fence panels, or uncommon colors often require additional manufacturing time. While standard fencing materials may be available immediately, custom components can sometimes take several weeks to arrive. In many projects, the fence cannot be fully completed until these specialty items have been delivered.
Permit Processing
Some communities require permits before a new fence can be installed. Depending on the local building department’s workload, permit approval may take anywhere from a few days to several weeks. If revisions to the application are requested or additional documentation is needed, the approval process may take even longer.
Concrete Curing Time
Although installing the fence posts may only take a few hours, the concrete supporting them needs time to develop sufficient strength. Professional installers often allow the recommended curing period to reduce the risk of posts shifting before rails, panels, or heavy gates are attached. Waiting for the concrete to cure properly helps create a stronger, longer-lasting fence.
Utility Company Scheduling
Before digging begins, underground utility lines should be located and marked. While contacting 811 is quick, utility companies generally need several business days to visit the property and complete the markings. During busy construction seasons, this waiting period may become one of the longest parts of the entire project.
Neighbor Concerns
Most fence projects proceed without issue, but occasionally neighbors have questions or concerns about the proposed installation. Discussions about fence placement, shared property boundaries, gate locations, or existing landscaping may take time to resolve. Open communication before construction begins can often prevent misunderstandings later.
Property Line Disagreements
Uncertain property boundaries are one of the most common reasons fence projects are delayed. If the location of the property line is disputed or cannot be clearly verified, homeowners may need to hire a licensed surveyor before construction continues. Although this adds time to the project, confirming property lines beforehand is usually far less expensive than relocating a completed fence.
Unexpected Site Conditions
Even after planning is complete, installers may encounter unexpected challenges once digging begins. Large rocks, buried concrete, old fence footings, tree roots, hidden utility lines, or poor soil conditions can slow excavation and require adjustments to the installation plan. These surprises are often impossible to identify until work is already underway.
Planning Helps Prevent Delays
Not every delay can be avoided, but many can be reduced with careful preparation. Confirming property lines, obtaining permits early, requesting utility marking in advance, ordering materials ahead of time, and communicating with neighbors before construction begins can help keep the project moving. A little planning before installation often saves much more time once the work starts.
Does Removing an Old Fence Take Longer?
Sometimes, yes. While many homeowners expect the new fence to be the most time-consuming part of the project, removing an old fence can take just as long or even longer. Years of weather exposure, deteriorated materials, and hidden obstacles below ground can make demolition much more challenging than it appears.
Old Concrete Footings
One of the biggest challenges is removing old concrete footings. Fence posts are often secured in large blocks of concrete buried below the surface, and these footings can be difficult to extract. In some cases, installers must break apart the concrete or use specialized equipment to remove it before new posts can be installed.
Broken or Rotten Fence Posts
Older wood fence posts frequently break off at ground level during removal, leaving the lower portion buried in the concrete. Extracting these broken posts often requires additional digging and may take considerably longer than removing posts that remain intact.
Tree Roots
Over time, tree roots can grow around fence posts and concrete footings, making removal much more difficult. Installers may need to cut through smaller roots or carefully work around larger root systems to avoid damaging nearby trees or landscaping.
Rusted Chain-Link Fencing
Older chain-link fences may have rusted posts, corroded hardware, or tightly stretched fencing that has become difficult to dismantle. Years of exposure to moisture and the elements can cause bolts, brackets, and fittings to seize, requiring additional time and specialized tools for safe removal.
Embedded Concrete and Hidden Obstacles
Some older fences contain larger-than-expected concrete footings or buried debris left behind from previous construction projects. Installers occasionally uncover bricks, rocks, abandoned pipes, old fence posts, or construction materials that were hidden beneath the surface. These unexpected discoveries often slow excavation and may require adjustments before the new fence can be installed.
Disposal and Haul-Away
Once the old fence has been removed, the materials still need to be loaded, transported, and properly disposed of or recycled. Wood, vinyl, metal, concrete, and hardware may all have different disposal requirements depending on local regulations. Many professional fence companies offer haul-away services, while others charge an additional fee for removing and disposing of the old materials.
Planning for Removal Time
If you’re replacing an existing fence, it’s a good idea to ask your contractor whether removal is included in the installation estimate and how much additional time it may require. Older fences, extensive concrete footings, mature landscaping, and difficult site conditions can all increase demolition time.
Sometimes Demolition Is the Hardest Part
Many homeowners are surprised to learn that removing an old fence can be more difficult than building a new one. Once the old materials and concrete footings have been cleared away, installing the replacement fence often progresses much more smoothly. As experienced contractors often say, the hardest part of building a new fence is sometimes taking the old one out first.
How Long Before You Can Use the Fence?
Once the installation is complete, many homeowners are eager to enjoy their new fence right away. However, depending on the type of fence and how it was installed, it may be best to wait before placing heavy stress on the posts or making final cosmetic improvements. Giving the fence time to fully stabilize helps ensure it remains straight, secure, and durable for years to come.
Allow the Concrete to Gain Strength
Although fence posts may feel solid shortly after installation, the concrete surrounding them continues to cure and gain strength over time. Many installers recommend avoiding unnecessary pressure on the fence until the concrete has had sufficient time to harden. This is especially important for heavy privacy fences, gates, and taller fence designs that place greater stress on the posts.
Give Gates Time for Final Adjustments
Newly installed gates may require minor adjustments after installation. As the posts settle and hardware is checked, installers may fine-tune hinges, latches, or alignment to ensure the gate opens and closes smoothly. Avoid forcing a gate that feels tight or slightly misaligned until any recommended adjustments have been completed.
When Can You Paint or Stain a Wood Fence?
If your fence is made from pressure-treated wood, it’s usually best to wait before painting or staining it. Freshly treated lumber contains moisture that needs time to dry before a finish is applied. Painting or staining too soon may prevent proper absorption and reduce the life of the finish. Many manufacturers recommend waiting several weeks or even a few months, depending on the type of wood, weather conditions, and the product being used.
Vinyl, Aluminum, and Composite Fences
Vinyl, aluminum, composite, and many steel fences generally require little or no finishing after installation. Once the posts are secure and the installer confirms the fence is ready, these materials can usually be enjoyed immediately without the need for painting or staining.
When Can Pets Use the Yard?
For many families, one of the biggest reasons for installing a fence is to provide a safe place for pets to play. Before letting dogs or other animals into the fenced area, walk the entire perimeter to make sure every gate latches securely, panels are fully attached, and there are no gaps where a pet could escape. Taking a few minutes to inspect the fence can provide peace of mind for years to come.
When Is It Safe for Children?
Children are often excited to explore a newly fenced yard, but it’s worth performing one final inspection before they begin playing. Check that gates latch properly, hardware is secure, and no tools, construction materials, or debris remain in the area. A quick walk around the fence helps ensure the yard is ready for safe outdoor activities.
Perform a Final Walk-Through
Even after professional installation, it’s a good idea to inspect the finished fence with the installer before considering the project complete. Confirm that the fence is level, gates operate smoothly, hardware is secure, and the work area has been cleaned. This is also a good opportunity to ask questions about maintenance, warranty coverage, and recommended care.
Enjoy Your New Fence
A new fence is more than just a property improvement. It can provide privacy, security, curb appeal, and a safe outdoor space for children and pets. Taking a little extra time after installation to allow the concrete to cure, inspect the finished work, and follow the manufacturer’s recommendations helps ensure your investment remains attractive and functional for many years to come.
And if your family decides to leave their initials or the installation date in a small amount of leftover concrete beside a gate post, giving the concrete time to cure properly helps ensure those memories last almost as long as the fence itself.
Does Fence Material Affect Installation Time?
Yes. The type of fencing material you choose can significantly affect how long installation takes. Some fences use prefabricated panels that install relatively quickly, while others require individual components to be assembled one piece at a time. The weight of the material, installation method, and amount of finishing work also influence the overall timeline.
Wood Fencing
Wood is one of the most popular residential fencing materials, but it is also one of the more time-consuming to install. Although some wood fences use prefabricated panels, many privacy fences require installers to attach each picket individually after the posts and rails have been installed. Measuring, spacing, and fastening hundreds of pickets adds considerable labor time. If the fence will later be painted or stained, additional time is required after the wood has had an opportunity to dry.
Vinyl Fencing
Vinyl fencing often installs faster than traditional wood fencing because many systems use interlocking posts, rails, and prefabricated panels. The components are manufactured to fit together, reducing the amount of cutting and assembly required on-site. However, installers must still ensure that every post is accurately spaced and perfectly level, since even minor alignment errors can make assembly difficult.
Chain-Link Fencing
Chain-link fencing is frequently one of the fastest types of permanent fencing to install. Once the posts have been set and the concrete has cured, installers attach rails and stretch the chain-link fabric across the framework. Because there are no individual pickets or decorative panels to install, chain-link fences can often be completed more quickly than many other fence styles, making them a popular choice for large properties.
Aluminum Fencing
Aluminum fencing typically uses lightweight prefabricated panels that can be attached relatively quickly once the posts are in place. Although the panels install efficiently, careful measuring and alignment are essential to maintain consistent spacing and an attractive appearance, particularly on sloped properties.
Steel Fencing
Steel fencing provides exceptional strength and security but is generally heavier than aluminum. The additional weight may require more careful handling, stronger hardware, and extra time during installation. Depending on the design, steel fencing may also require more precise adjustments to ensure panels and gates operate smoothly.
Wrought Iron Fencing
Wrought iron is often one of the most labor-intensive fencing materials to install. Individual panels are heavy, decorative components require careful alignment, and the weight of the fence demands accurately installed posts with strong foundations. Decorative gates and ornamental details may add even more installation time, making wrought iron one of the slower fencing systems to complete.
Composite Fencing
Composite fencing combines wood fibers and recycled plastics to create a durable, low-maintenance product. Many composite fence systems use modular components that simplify installation, although the materials are generally heavier than vinyl. Careful assembly and accurate measurements remain important for achieving a clean, professional appearance.
Split Rail Fencing
Split rail fencing is often one of the simplest fence styles to install because it uses relatively few components and does not require closely spaced pickets or solid privacy panels. While installers must still accurately position the posts, assembling the rails is usually straightforward, allowing many split rail fences to be completed more quickly than privacy fences.
Choosing the Right Material
Every fencing material offers different advantages, and installation time is only one consideration. Homeowners should also think about appearance, maintenance requirements, durability, privacy, and budget. A fence that takes an extra day to install may provide decades of reliable service and require far less maintenance over its lifetime. Selecting the right material for your property often has a greater impact than simply choosing the one that installs the fastest.
Related Articles
- How Long Does It Take to Build a Deck?
- How Long Does It Take to Sell a House?
- How Long Does It Take to Pressure Wash a House?
- How Long Does It Take to Paint a Room?
- How Long Does It Take to Clean a House?
Frequently Asked Questions
Why does fence installation take so long?
Permits, weather, difficult soil conditions, and material delays may increase installation time.
Do fences require permits?
Many areas require permits for new fence installations.
Can weather delay fence installation?
Yes. Rain and frozen ground often slow digging and construction.
What type of fence installs the fastest?
Chain-link fences often install faster than wood or custom decorative fences.
Does property size affect installation time?
Yes. Larger properties usually require more labor and materials.
Should utilities be marked before installing a fence?
Yes. Underground utility lines should always be identified before digging.
Can I install a fence without concrete?
Sometimes. Some fence types, such as certain metal fence systems or temporary fencing, may not require concrete. However, most permanent residential fences use concrete to secure the fence posts and improve stability. Always follow the fence manufacturer’s recommendations and local building requirements.
Do I need a property survey before installing a fence?
Not always, but it’s often a good idea. A recent property survey can help confirm your property boundaries and reduce the risk of accidentally building on a neighbor’s land. If boundary lines are unclear, obtaining a survey before construction begins may help avoid costly disputes later.
Can my neighbor stop me from installing a fence?
Generally, homeowners may install a fence on their own property if it complies with local zoning regulations, building codes, and homeowner association (HOA) rules. However, disputes over property lines, shared fences, easements, or neighborhood restrictions can sometimes delay a project. If you’re unsure where the property line is located, consider having it professionally surveyed before installation.
Should I stain or seal a new wood fence immediately?
Usually not. Many pressure-treated wood fences should be allowed to dry for several weeks or even a few months before applying stain or sealant. Applying a finish too soon may prevent proper absorption and reduce its effectiveness. Always follow the fence manufacturer’s recommendations for your specific type of wood.
Can rain delay fence installation?
Yes. Heavy rain can make digging post holes difficult, soften the soil, and interfere with concrete curing. Severe weather may also create unsafe working conditions for installers. Although light rain doesn’t always stop construction, prolonged wet weather often extends the installation timeline.
How deep should fence posts be?
The required depth depends on the fence height, soil conditions, local building codes, and climate. As a general guideline, fence posts are often buried about one-third of their total length to provide adequate support. Taller fences, gates, and areas with strong winds may require deeper post holes for added stability.
How long does vinyl fencing last?
Vinyl fencing is known for its durability and often lasts 20 to 30 years or more with routine maintenance. Unlike wood, vinyl does not typically require painting or staining and is resistant to rot, insects, and moisture. Actual lifespan depends on product quality, installation, weather exposure, and ongoing maintenance.
Do installers remove the old fence?
Many professional fence companies offer old fence removal and disposal as part of the installation service, while others charge an additional fee. Removal time depends on the fence material, the number of posts, whether concrete footings must be removed, and local disposal requirements. It’s a good idea to ask whether haul-away service is included when requesting an estimate.
Do I need to call 811 before installing a fence?
Yes. Before digging any post holes, homeowners should contact 811 to request that underground utility lines be located and marked. This free service helps prevent accidental damage to buried gas, electric, water, sewer, cable, and communication lines. In most areas, utility marking should be completed before any excavation begins.
How long should concrete cure before attaching fence panels?
Fast-setting concrete may allow work to continue sooner, but many installers allow at least 24 to 48 hours before placing significant weight on fence posts. Full concrete strength continues to develop over time, and cure times may vary depending on the product used and weather conditions.
Can fences be installed on sloped property?
Yes. Fences can usually be installed on sloped or uneven ground using stepped or racked installation methods. However, measuring, digging, and aligning fence posts on hillsides often takes more time than installing a fence on level ground.
Does winter affect fence installation?
It can. Frozen ground makes digging more difficult, and concrete may require longer curing times in cold weather. Although fence installation is still possible in many climates during winter, weather conditions may slow the project compared with spring or summer.
How much space should there be under a fence?
The ideal clearance depends on the fence type, local building codes, and the terrain. Some fences are installed close to the ground for privacy, while others are raised slightly to accommodate uneven surfaces, drainage, or landscaping. Your installer can recommend an appropriate height for your property.
Can I install a fence directly on my property line?
That depends on local zoning rules, subdivision regulations, and HOA requirements. Some communities allow fences on the property line, while others require setbacks. Verifying your property boundaries and checking local regulations before installation can help prevent disputes with neighbors.
Quick Summary
Installing a fence can take anywhere from one day to several weeks depending on property size, fence material, permits, utility marking, ground conditions, weather, and whether an existing fence must be removed. While professional crews often complete straightforward residential installations within a few days, planning, post installation, concrete curing, and final inspections all contribute to the overall timeline. Preparing your property in advance, confirming boundaries, obtaining permits early, and allowing the fence to cure properly can help ensure a successful installation that lasts for many years.
Sources & References
- Official 811 “Call Before You Dig” resources.
- U.S. Department of Housing and Urban Development where applicable for property guidance.
- Manufacturer installation manuals from Trex, CertainTeed, and major fence manufacturers.
- International Code Council for building code guidance.
- Local permitting resources as general references.
- Local building departments
- American Fence Association (AFA)
- Concrete manufacturers (for curing guidance)
Editorial Review
Reviewed by the Quick Answer Guide Editorial Team
Last reviewed: June 2026
Quick Answer Guide publishes practical, research-based answers to common questions about money, technology, health, travel, home improvement, and everyday life. Content is reviewed using official government resources, educational institutions, industry publications, and other authoritative sources when appropriate. Articles are updated periodically to improve accuracy and usefulness.