
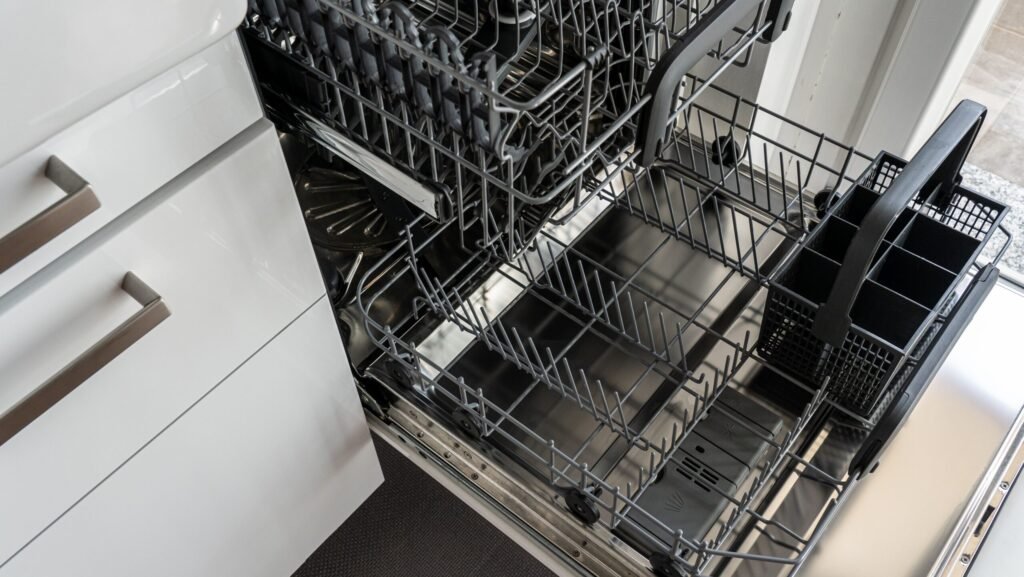
If you’re planning to install a new dishwasher, you may be wondering how long the job will take. Replacing an existing dishwasher is often a straightforward project that can be completed in a couple of hours, while first-time installations may require considerably more time. Plumbing connections, electrical work, cabinet modifications, and careful leak testing all affect the installation timeline. Understanding the process ahead of time can help you prepare your kitchen and avoid unexpected delays.
Quick Answer
Installing a dishwasher typically takes 1 to 3 hours when replacing an existing unit with compatible plumbing and electrical connections already in place. First-time installations often take several hours or even a full day because new water supply lines, drainage, electrical circuits, or cabinet modifications may be required. The total time depends on your kitchen layout, the condition of existing utilities, and whether unexpected repairs are discovered during installation.
Typical Dishwasher Installation Timeline
Typical dishwasher installation timelines often include:
- Replacing an existing dishwasher: Usually 1–2 hours
- First-time dishwasher installation: Several hours or longer
- Plumbing or electrical upgrades: Additional time may be needed
- Leak testing and final adjustments: Extra setup time possible
Straightforward replacements usually move much faster than installations requiring cabinet or utility modifications.
Typical Dishwasher Installation Times
| Installation Type | Typical Time |
| Replace existing dishwasher | 1 to 2 hours |
| Replace with minor plumbing adjustments | 2 to 3 hours |
| First-time installation | 4 to 8 hours |
| New construction installation | Often completed during construction |
| Complex cabinet modifications | Several additional hour |
What Can Delay Dishwasher Installation?
Several factors can slow down dishwasher installation and extend the timeline.
Plumbing and Electrical Work
Dishwasher installations may require:
- water line connections
- drain hose setup
- electrical wiring
- outlet installation
- shutoff valve adjustments
Older homes may also need updated plumbing or electrical components before installation can be completed safely.
Cabinet Space Adjustments
Tight cabinet openings or incorrect appliance dimensions sometimes require trimming or modifications before the dishwasher will fit properly.
Old Appliance Removal
Disconnecting and removing older dishwashers may take additional time, especially if parts are rusted, difficult to access, or improperly installed.
Leak Testing
Installers usually test water connections carefully before finishing the project to help prevent leaks and water damage later.
Why First-Time Installations Take Longer
Installing a dishwasher where one has never existed before usually requires significantly more work.
This may involve:
- adding water supply lines
- installing drainage connections
- running electrical wiring
- modifying cabinets
- creating space near sinks or countertops
Because of this, first-time dishwasher installations are often much more complicated than replacing an older unit.
Measure the Cabinet Opening
Before purchasing a new dishwasher, carefully measure the width, height, and depth of the cabinet opening. Although most built-in dishwashers are manufactured to standard dimensions, slight size differences can affect the installation. Confirming that the appliance will fit properly helps avoid delays caused by returns, exchanges, or cabinet modifications.
Choose the Correct Dishwasher Size
Selecting a dishwasher that closely matches the dimensions of your existing unit usually makes installation much easier. Replacing an older dishwasher with a similar-sized model often allows installers to reuse the existing opening with few or no adjustments.
Replace the Water Supply Line
Many installers recommend installing a new water supply line whenever a dishwasher is replaced. A new supply line is relatively inexpensive, helps ensure a reliable connection, and may prevent leaks caused by older hoses or worn fittings. Replacing it during installation is often easier than repairing a leak later.
Install a New Connector Kit
Many new dishwashers require a separate installation or connector kit that includes items such as fittings, adapters, brackets, or a power cord, depending on the model. Having the correct kit ready before installation begins helps avoid unnecessary trips to the hardware store and keeps the project moving.
Clear the Work Area
Remove any items stored beneath the kitchen sink and clear the space around the dishwasher before installation begins. Providing easy access to the water shutoff valve, electrical connections, and drain lines allows the installer to work more efficiently and safely.
Gather the Necessary Tools
Having all required tools within reach can save considerable time during installation. Common tools include an adjustable wrench, screwdriver, pliers, drill, level, bucket, towels, flashlight, and a voltage tester. Being prepared helps prevent interruptions once the installation is underway.
Read the Installation Instructions
Although many dishwashers are installed in a similar manner, manufacturers may have different requirements for plumbing connections, electrical wiring, mounting brackets, or drain hose routing. Reviewing the installation manual before starting can help prevent mistakes and reduce the likelihood of having to redo part of the installation.
Turn Off the Water and Power First
Before disconnecting the old dishwasher or connecting the new one, shut off both the water supply and the electrical power. Taking this step before beginning the project improves safety and prevents unnecessary interruptions later if you need to stop and locate the correct shutoff valve or circuit breaker.
Plan for a Final Test
Allow enough time at the end of the installation to run a short test cycle and inspect the dishwasher for leaks, proper drainage, and normal operation. Taking a few extra minutes to verify everything is working correctly can help prevent more time-consuming repairs after the installation is complete.
Can You Install a Dishwasher Yourself?
Yes, many homeowners can install a dishwasher themselves, especially when replacing an existing unit that already has compatible plumbing, electrical connections, and cabinet space. However, the project requires basic plumbing, electrical, and mechanical skills, along with careful attention to the manufacturer’s installation instructions.
If you’re comfortable working with household plumbing and safely connecting electrical components, replacing an existing dishwasher can often be completed in a few hours. First-time installations are generally more complex and may require professional assistance.
DIY Installation Is Often Possible
Replacing an older dishwasher with a similar-sized model is usually the easiest type of installation. Since the water supply, drain line, and electrical connection are already in place, the work often involves removing the old appliance, connecting the new one, leveling it, securing it to the cabinets or countertop, and testing for leaks.
What Skills Are Needed?
A successful dishwasher installation requires several basic home improvement skills, including:
- safely shutting off water and electrical power
- connecting water supply lines
- attaching the drain hose correctly
- making electrical connections if the dishwasher is hardwired
- leveling the appliance
- checking for leaks during a test cycle
If you’re unfamiliar with any of these tasks, reviewing the installation manual before beginning can help you decide whether the project is within your comfort level.
What Tools Will You Need?
Most dishwasher installations require only common household tools, such as:
- adjustable wrench
- screwdrivers
- pliers
- level
- drill or screwdriver with bits
- bucket or shallow pan
- towels for any remaining water
- flashlight
- voltage tester
- PTFE (thread seal) tape, if recommended by the manufacturer
Having everything ready before you begin can make the installation go more smoothly.
What Takes the Longest During Installation?
Many dishwasher installations take longer because of preparation and connection work rather than simply sliding the appliance into place.
The most time-consuming steps are often:
- removing the old dishwasher
- adjusting water lines
- connecting drain hoses
- securing electrical wiring
- fitting the dishwasher into tight cabinet spaces
- testing for leaks
Older kitchens sometimes require additional plumbing or electrical updates before installation can safely continue.
To Walk you through the entire process:
- Shut off water and electricity.
- Remove old dishwasher.
- Disconnect plumbing.
- Disconnect electrical wiring.
- Inspect water valve.
- Install new supply line if needed.
- Connect drain hose.
- Connect power.
- Slide dishwasher into cabinet.
- Level the appliance.
- Secure mounting brackets.
- Restore power and water.
- Test for leaks.
- Run a short wash cycle.
- Final inspection.
Now you can see the whole process and you will be aware as the final steps are approaching.
Plumbing Connections
A dishwasher requires more than just a nearby sink to operate properly. It must be connected to your home’s water supply and drainage system, and each connection must be installed carefully to prevent leaks and ensure reliable performance. Depending on your kitchen and the age of your plumbing, these connections may add significant time to the installation.
Hot Water Supply
Dishwashers use hot water supplied by your home’s plumbing system to clean dishes effectively. During installation, the appliance is connected to the hot water line, and the connection is checked carefully for leaks before the dishwasher is placed into service.
Water Shutoff Valve
Most installations include a dedicated shutoff valve located beneath the kitchen sink. This valve allows the water supply to be turned off during installation and makes future repairs or replacements much easier. If the existing valve is damaged or difficult to operate, replacing it may add time to the installation.
Water Supply Line
The water supply line carries hot water from the shutoff valve to the dishwasher. Many installers recommend replacing the supply line when installing a new dishwasher, even if the old one still appears to be in good condition. Installing a new line can help reduce the risk of leaks and improve long-term reliability.
Drain Hose
After each wash cycle, wastewater leaves the dishwasher through the drain hose. The hose must be routed correctly and securely connected to prevent leaks and ensure the appliance drains properly. A kinked or improperly installed drain hose can lead to poor drainage or standing water inside the dishwasher.
Garbage Disposal Connection
In many kitchens, the dishwasher drain hose connects directly to the garbage disposal rather than the sink drain. If a new garbage disposal has recently been installed, the installer may need to remove the factory knockout plug before the dishwasher can drain properly. Forgetting this step is a common cause of drainage problems after installation.
Air Gap (Where Required)
Some local plumbing codes require an air gap, a small fitting mounted on the sink or countertop that helps prevent contaminated water from flowing back into the dishwasher. While not required in every area, an air gap provides additional protection against backflow and should be installed whenever required by local regulations.
High Loop Drain Hose
In locations where an air gap is not required, many manufacturers specify a high loop for the drain hose. The hose is secured as high as possible beneath the countertop before connecting to the drain. This simple installation technique helps reduce the risk of wastewater flowing back into the dishwasher and improves drainage performance.
Electrical Connections
Dishwashers also require a safe electrical connection before they can operate. Depending on the appliance and your home’s wiring, the installation may involve plugging the dishwasher into an outlet or making a hardwired electrical connection. Electrical work should always follow the manufacturer’s instructions and local building codes.
Hardwired vs. Plug-In Connections
Some dishwashers are designed to be hardwired, meaning the electrical wiring connects directly to the appliance inside a junction box. Others use a standard power cord that plugs into an electrical outlet located beneath the sink. The installation method depends on the dishwasher model and your home’s existing electrical setup.
Dedicated Electrical Circuit
Many dishwashers are installed on a dedicated electrical circuit that supplies power only to the appliance. A dedicated circuit helps prevent overloaded circuits and ensures the dishwasher receives a reliable power supply during operation. Electrical requirements vary by manufacturer and local code.
GFCI Protection
Depending on your local electrical code and the location of the receptacle, Ground Fault Circuit Interrupter (GFCI) protection may be required. GFCI protection is designed to reduce the risk of electrical shock by shutting off power if it detects an electrical fault.
Turning Off the Circuit Breaker
Before beginning any electrical work, the appropriate circuit breaker should be switched off and the circuit verified as de-energized with a suitable tester. This important safety step helps reduce the risk of electrical shock while connecting or disconnecting wiring.
Following Local Building Codes
Electrical installation requirements can vary by state, county, or municipality. Local building codes may specify the type of electrical connection, circuit protection, or permit requirements for dishwasher installations. Following both the manufacturer’s instructions and local codes helps ensure a safe installation and may be important for inspections, warranty coverage, and future home sales.
Cabinet Space and Size Adjustments
Most built-in dishwashers are designed to fit standard kitchen cabinet openings, but even small differences in measurements can affect how quickly the installation is completed. Before purchasing a new dishwasher, it’s important to measure the available space carefully to ensure the appliance will fit properly.
Opening Width
The cabinet opening must be wide enough for the dishwasher to slide into place without forcing it. While most standard built-in dishwashers are approximately 24 inches wide, slight variations between manufacturers or older custom cabinetry may require small adjustments.
Opening Height
The height of the cabinet opening is just as important as the width. If the opening is too short, the dishwasher may not fit beneath the countertop. Installers often measure from the finished floor to the underside of the countertop to verify there is adequate clearance.
Countertop Clearance
The dishwasher needs enough room to slide underneath the countertop without damaging the appliance or surrounding cabinets. Countertop materials, mounting brackets, and decorative trim can sometimes reduce the available space and require minor adjustments during installation.
Flooring Height
New flooring installed after the original dishwasher was put in place can sometimes reduce the available opening. Tile, hardwood, or luxury vinyl flooring may raise the finished floor enough to make removing the old dishwasher or installing the new one more difficult. In some cases, additional adjustments may be necessary to create enough clearance.
Toe Kick Clearance
The toe kick is the recessed space at the bottom of your kitchen cabinets where your feet naturally rest while standing at the countertop. Limited toe kick clearance or decorative trim can make it more difficult to slide the dishwasher into position or remove an older unit. Installers may need to temporarily remove trim pieces or make minor adjustments to ensure a proper fit.
Adjusting the Leveling Feet
Most dishwashers include adjustable leveling feet that allow installers to raise or lower the appliance for a precise fit. Proper adjustment helps ensure the dishwasher sits level, the door opens and closes correctly, and the appliance drains as intended. It also allows the dishwasher to fit snugly beneath the countertop without placing unnecessary pressure on the surrounding cabinetry.
Measure Before You Buy
Taking accurate measurements before purchasing a dishwasher is one of the easiest ways to avoid installation delays. Confirming the opening’s width, height, depth, and available clearance can help ensure the new appliance fits properly and reduces the need for unexpected cabinet modifications.
Does Removing the Old Dishwasher Take Longer?
Sometimes, yes. While removing an existing dishwasher is often a straightforward process, older appliances can be surprisingly difficult to disconnect and remove. In some cases, removing the old dishwasher takes longer than installing the new one because of worn parts, tight spaces, or outdated plumbing and electrical connections.
Rusted Water Connections
Over time, moisture can cause water supply fittings and shutoff valves to rust or corrode. Rusted fittings may be difficult to loosen without damaging the plumbing, requiring extra care and additional time during removal.
Seized Mounting Screws
Most dishwashers are secured beneath the countertop or to the surrounding cabinets with mounting brackets and screws. After years of use, these screws may become rusted, stripped, or seized in place, making them difficult to remove without specialized tools or replacement hardware.
Trapped Beneath New Flooring
A common problem occurs when new flooring is installed around an older dishwasher instead of underneath it. The additional flooring height can leave the appliance trapped beneath the countertop, making it difficult or even impossible to slide out without first adjusting the leveling feet or removing portions of the surrounding trim.
Swollen or Damaged Cabinets
Past water leaks or long-term moisture exposure can cause cabinet materials to swell or warp. Swollen cabinets may reduce the available opening, making it harder to remove the old dishwasher or fit the new one into place without minor adjustments.
Corroded Plumbing Components
Older shutoff valves, drain connections, and plumbing fittings may become corroded over time. Corrosion can make connections difficult to disconnect and may reveal parts that should be replaced before the new dishwasher is installed.
Older Copper Plumbing
Some older homes still use original copper plumbing connections that may require extra care during removal. Older pipes and fittings can be more susceptible to damage if excessive force is used, and replacing worn valves or connectors during the installation may help improve long-term reliability.
Unexpected Repairs Can Add Time
Removing an old dishwasher sometimes uncovers hidden problems such as leaking valves, damaged flooring, deteriorated water lines, or outdated electrical wiring. Addressing these issues before installing the new appliance helps ensure a safe and reliable installation, but it can extend the overall project timeline.
Plan for the Unexpected If your existing dishwasher has been in place for many years, it’s a good idea to allow extra time for removal. Although many replacements are completed within a few hours, older kitchens or appliances with rusted components may require additional work before the new dishwasher can be installed
Common Dishwasher Installation Mistakes
Even a straightforward dishwasher installation can run into problems if important steps are overlooked. Many common mistakes are easy to avoid with careful preparation and attention to the manufacturer’s installation instructions.
Installing the Drain Hose Too Low
Installing the Drain Hose Too Low
A drain hose that hangs too low can allow dirty water to flow back into the dishwasher after a wash cycle. This may lead to unpleasant odors, poor cleaning performance, or standing water inside the appliance.
Forgetting the High Loop or Air Gap
Forgetting the High Loop or Air Gap
Many installations require the drain hose to be secured in a high loop beneath the countertop or connected through an air gap, depending on local plumbing codes and the manufacturer’s instructions. This helps prevent wastewater from flowing backward into the dishwasher and contaminating clean dishes.
Overtightening Water Fittings
Overtightening Water Fittings
It may seem like tightening plumbing connections as much as possible will prevent leaks, but overtightening can damage threads, crush washers, or crack plastic fittings. Tightening connections according to the manufacturer’s recommendations helps create a secure seal without causing damage.
Cross-Threading Connections
When threaded fittings are forced together at the wrong angle, the threads can become damaged, creating leaks that may not be immediately noticeable. Taking a few extra moments to start threaded connections by hand before tightening them with a wrench helps prevent this common problem.
Failing to Level the Dishwasher
A dishwasher should sit level from front to back and side to side. If it is tilted, the door may not seal properly, water may not drain completely, and cleaning performance may be reduced. Most models include adjustable leveling feet to help achieve a proper fit.
Leaving Electrical Connections Loose
Whether the dishwasher is hardwired or connected with a power cord, all electrical connections should be secure and properly insulated. Loose wiring can prevent the dishwasher from operating correctly and may create electrical hazards.
Pinching the Water Supply Line
As the dishwasher is pushed into the cabinet opening, it’s possible to accidentally pinch or kink the water supply line or drain hose. This can restrict water flow, reduce performance, or eventually cause leaks. Checking that all hoses and lines remain straight and unobstructed before securing the appliance can help prevent this issue.
Skipping the Leak Test
Some homeowners are eager to finish the installation and begin using the dishwasher, but skipping the final leak test can allow small plumbing problems to go unnoticed. Running a short test cycle and inspecting all water connections is one of the most important steps in the installation process.
Not Reading the Installation Manual
Although most dishwashers are installed using similar methods, every manufacturer may have specific requirements for plumbing connections, electrical wiring, mounting brackets, or drain hose routing. Following the installation manual helps ensure the appliance is installed safely and according to the manufacturer’s recommendations.
Should You Replace the Water Supply Line?
In many cases, yes. Although an existing water supply line may still be functional, many professional installers recommend replacing it whenever a new dishwasher is installed. A new supply line is relatively inexpensive and can help reduce the risk of leaks that could damage cabinets, flooring, or the subfloor over time.
Older Supply Lines Can Wear Out
Even braided stainless steel supply lines have a limited lifespan. Over time, rubber liners can deteriorate, fittings may corrode, and repeated water pressure changes can weaken the connection. If the existing supply line is several years old or shows signs of wear, replacing it is often the safer choice.
New Connections Help Reduce Leak Risks
Every time a supply line is disconnected and reconnected, there is a chance that older fittings or seals may no longer create a watertight connection. Installing a new supply line with fresh washers and fittings can help minimize the risk of slow leaks that might go unnoticed until water damage occurs.
It’s Inexpensive Protection
Compared to the overall cost of purchasing and installing a dishwasher, a new water supply line is relatively inexpensive. Spending a little extra during installation can help avoid much more costly repairs caused by water leaks in the future. For many homeowners, it’s a small investment that provides added peace of mind.
When Can the Existing Supply Line Be Reused?
If the existing supply line is fairly new, in excellent condition, and compatible with the new dishwasher, it may be reused if the manufacturer allows it. However, it should always be carefully inspected for corrosion, kinks, cracks, loose fittings, or any signs of damage before being reconnected.
Follow the Manufacturer’s Recommendations
Some dishwasher manufacturers recommend installing a new water supply line as part of the installation process. Following the manufacturer’s instructions and local plumbing codes helps ensure a safe installation and may also help protect your warranty.
Why Leak Testing Is So Important
One of the final and most important steps of a dishwasher installation is checking for leaks. Although it may add a few extra minutes to the installation, careful leak testing can help prevent costly repairs and water damage later. Professional installers typically spend extra time inspecting every connection because even a very small leak can become a major problem if it goes unnoticed.
Tiny Leaks Can Become Big Problems
Not every leak is obvious. A few drops of water escaping from a loose fitting or worn washer may seem insignificant, but over days or weeks those small leaks can cause considerable damage. Because the dishwasher is usually hidden beneath the countertop, homeowners may not notice a slow leak until visible damage has already occurred.
Slow Leaks Are Easy to Miss
Unlike a burst pipe, a slow leak may only occur while the dishwasher is running. Water can drip behind cabinets or beneath the appliance without creating a noticeable puddle on the kitchen floor. This is why installers carefully inspect all plumbing connections during and after the first test cycle.
Hidden Water Damage
Dishwashers are installed inside cabinets, making it difficult to see what’s happening behind or underneath the appliance. Water that leaks into these concealed areas can remain undetected for long periods, allowing damage to spread before anyone realizes there is a problem.
Protecting Cabinets and Countertops
Kitchen cabinets are often made from wood or engineered wood products that can swell, warp, discolor, or deteriorate when exposed to moisture. Catching a leak during installation helps protect cabinetry and nearby countertops from unnecessary water damage.
Preventing Damage to the Subfloor
Water that escapes beneath the dishwasher can soak into the subfloor below. Over time, this may weaken flooring materials, cause hardwood floors to warp, damage vinyl or laminate flooring, or require expensive repairs that extend well beyond replacing a plumbing fitting.
Reducing the Risk of Mold Growth
Persistent moisture trapped beneath cabinets or flooring creates an environment where mold and mildew can develop. Mold growth may be difficult to detect until odors appear or visible damage becomes noticeable. Confirming that all plumbing connections are completely watertight helps reduce this risk.
Avoiding Costly Insurance Claims
Water damage is one of the most common and expensive types of home repairs. Depending on the cause and the terms of your homeowner’s insurance policy, repairs related to long-term leaks may not always be fully covered. Spending a few extra minutes checking for leaks during installation can help prevent repairs that may cost hundreds or even thousands of dollars.
How Professionals Test for Leaks
Professional installers don’t simply turn on the water and assume everything is working correctly. They typically inspect the water supply connection, drain hose, and fittings while the dishwasher fills, washes, drains, and shuts off. After the test cycle, they often perform a final inspection to confirm there are no signs of moisture around the plumbing connections or beneath the appliance.
How Long Does the First Wash Cycle Take?
After installing a new dishwasher, most professionals run a short test cycle to make sure everything is working correctly. This initial cycle is often a quick wash or rinse program and typically takes 15 to 30 minutes, although the exact time varies depending on the dishwasher model and selected cycle.
The purpose of this first cycle isn’t to wash dishes. Instead, it’s to confirm that the dishwasher was installed properly and is operating safely before regular use.
Checking for Leaks
One of the most important parts of the test cycle is inspecting all water connections for leaks. Installers check the water supply line, drain hose, and fittings while the dishwasher fills, washes, drains, and shuts off. Even a small drip can lead to water damage over time if it isn’t corrected.
Confirming Proper Drainage
The installer also verifies that the dishwasher drains completely at the end of the cycle. Standing water inside the tub or slow drainage may indicate a kinked drain hose, an improper drain connection, or another installation issue that should be corrected before the appliance is used regularly.
Listening for Unusual Noises
Some operating sounds are completely normal, but loud grinding, rattling, or knocking noises may indicate that a hose, mounting bracket, or internal component needs adjustment. Detecting unusual sounds during the first cycle allows problems to be corrected before they become more serious.
Inspecting the Door Seal
During and after the test cycle, the installer checks the door gasket and seal for any signs of water escaping around the edges. A properly installed dishwasher should close securely and keep water completely contained throughout the wash cycle.
Final Inspection
Once the test cycle finishes, the installer typically performs one final inspection to ensure there are no leaks, the dishwasher is level, the controls operate correctly, and the appliance is securely fastened beneath the countertop or inside the cabinet opening. After these checks are complete, the dishwasher is ready for normal use.
Ways to Install a Dishwasher Faster
Dishwasher installations usually go more smoothly when preparation is completed before the appliance arrives.
Helpful ways to reduce delays include:
- measuring cabinet space carefully
- clearing the work area beforehand
- checking plumbing connections ahead of time
- confirming electrical compatibility
- choosing the correct appliance size
- keeping installation instructions available
Many homeowners also find that replacing an existing dishwasher with a similar model often simplifies the installation process considerably
Ways to Install a Dishwasher Faster
While every installation is different, a little preparation can help the process go more smoothly and reduce unexpected delays. Whether you’re installing the dishwasher yourself or hiring a professional, taking a few simple steps beforehand can save time and help prevent common installation problems.
When Should You Call a Plumber?
Hiring a plumber is often the best option if the installation requires:
- installing new water supply lines
- relocating plumbing connections
- replacing damaged shutoff valves
- repairing leaking pipes
- adding a drain connection where one does not already exist
Professional plumbing work can help ensure reliable water connections and reduce the risk of future leaks.
When Should You Call an Electrician?
An electrician may be needed if the installation requires:
- installing a new dedicated electrical circuit
- adding a new outlet
- replacing damaged wiring
- upgrading older electrical systems
- resolving electrical code issues
Electrical work should always be completed safely and in accordance with local building codes.
Check Local Permit Requirements
Some communities require permits or inspections for certain plumbing or electrical work associated with installing a dishwasher, particularly if new water lines, drain connections, or electrical circuits are being added. Simply replacing an existing dishwasher with compatible connections often does not require a permit, but requirements vary by location.
If you’re unsure, check with your local building department before beginning the project. Following local building codes helps ensure the installation is completed safely and may be important for insurance coverage, future home sales, or warranty compliance.
Related Articles
If you are working on kitchen or home installation projects, these related guides may also help:
- How Long Does It Take to Install a Water Heater?
- How Long Does It Take to Paint Cabinets?
- How Long Does It Take to Install a Ceiling Fan?
- How Long Does It Take to Assemble Furniture?
- How Long Does It Take to Install Flooring?
Frequently Asked Questions
Here are some common questions homeowners ask before installing a dishwasher:
Why does dishwasher installation take so long?
Plumbing setup, electrical work, and cabinet adjustments may increase installation time.
Can you install a dishwasher yourself?
Many homeowners install dishwashers themselves, although plumbing and electrical experience may help.
Does replacing an old dishwasher take less time?
Usually yes. Existing plumbing and electrical connections often simplify installation.
Do dishwashers need special electrical connections?
Many dishwashers require dedicated electrical connections or outlets.
Should you test for leaks after installation?
Yes. Leak testing helps prevent water damage and connection problems.
Can a dishwasher be installed where there was none before?
Usually yes, although new plumbing, drainage, and electrical connections may need to be added first.
Do dishwashers need plumbing connections?
Yes. Dishwashers require water supply lines and drainage connections to operate properly.
Is installing a dishwasher harder in older homes?
Sometimes. Older kitchens may require plumbing, cabinet, or electrical upgrades before installation can be completed safely.
Can cabinet size affect installation time?
Yes. Tight spaces or incorrect dimensions may require additional adjustments.
Can I use the old water supply line?
It depends on its condition. Many installers recommend replacing the water supply line whenever a new dishwasher is installed, especially if the existing line is old, worn, or shows signs of corrosion. Installing a new supply line is relatively inexpensive and can help reduce the risk of future leaks.
Do I need a new shutoff valve?
Not always. If the existing shutoff valve works properly and does not leak, it can often be reused. However, if the valve is damaged, difficult to operate, or shows signs of corrosion, replacing it during the installation may help prevent future plumbing problems.
Why is my dishwasher leaking after installation?
Leaks are often caused by loose water connections, improperly attached drain hoses, worn seals, or fittings that were not tightened correctly. In some cases, the dishwasher may not be level, causing water to collect where it shouldn’t. Running a test cycle and checking all connections can help identify the source of the leak.
Should I replace the drain hose?
Many manufacturers recommend replacing the drain hose if the existing one is damaged, brittle, or does not meet the new dishwasher’s installation requirements. A new drain hose can improve reliability and help reduce the chance of leaks or drainage problems.
Can I run the dishwasher immediately after installation?
Yes. After the water supply and electrical connections have been checked and the installer confirms there are no leaks, it’s common to run a short wash or rinse cycle. This helps verify that the dishwasher fills, drains, and operates correctly before regular use.
Does flooring affect installation?
Yes. Flooring can affect how easily a dishwasher slides into place and whether it sits level. If new flooring has been installed around an older dishwasher instead of underneath it, removing or replacing the appliance may require additional adjustments.
Do installers haul away the old dishwasher?
Sometimes. Many appliance retailers and professional installers offer haul-away services for an additional fee, while others include removal as part of the installation package. It’s a good idea to confirm this service before scheduling your installation.
Does every dishwasher need an air gap?
Not always. Some local plumbing codes require an air gap to help prevent contaminated water from flowing back into the dishwasher, while others allow a properly installed high loop in the drain hose instead. Requirements vary by location, so it’s important to follow local building codes and the manufacturer’s installation instructions.
Do I need a professional to install a dishwasher?
Not necessarily. Many homeowners with basic plumbing and electrical experience can replace an existing dishwasher themselves. However, if new plumbing, electrical wiring, or cabinet modifications are required, hiring a qualified professional is often the safest option.
Can I install a dishwasher without replacing my cabinets?
Usually, yes. Most replacement dishwashers are designed to fit standard cabinet openings. However, if the new appliance has different dimensions, minor cabinet adjustments may be necessary to achieve a proper fit.
What happens if the dishwasher isn’t level?
A dishwasher that is not level may not drain properly, the door may not seal correctly, and water could leak during operation. Most installers use adjustable leveling feet to ensure the appliance sits evenly before securing it in place.
Do all dishwashers fit the same opening?
Most built-in dishwashers are manufactured to standard dimensions, but slight differences in height, width, and depth can occur between models. Measuring your cabinet opening before purchasing a new dishwasher helps ensure a proper fit and can prevent installation delays.
Should I replace the electrical cord during installation?
If your dishwasher uses a power cord and the existing cord is damaged or incompatible with the new appliance, replacing it is usually recommended. Hardwired dishwashers should have their electrical connections inspected to ensure they meet the manufacturer’s requirements.
How can I prepare before the installer arrives?
You can help speed up the installation by emptying the old dishwasher, clearing the area around the appliance, removing items stored under the sink if necessary, and ensuring there is easy access to the water shutoff valve and electrical connections.
Quick Summary
Replacing an existing dishwasher typically takes between one and three hours, while first-time installations often require several additional hours because of new plumbing, drainage, electrical work, or cabinet modifications. Careful preparation, accurate measurements, proper utility connections, and thorough leak testing all help ensure the dishwasher operates safely and efficiently. Whether you install the appliance yourself or hire a professional, taking the time to complete each step correctly can help prevent future plumbing problems and extend the life of the appliance.
Sources & References
- U.S. Department of Energy guidance on dishwashers and efficiency.
- International Association of Certified Home Inspectors articles on dishwasher installation and inspection practices.
- Official installation manuals from major manufacturers such as Whirlpool, GE Appliances, Bosch, and KitchenAid.
- The International Code Council for plumbing and electrical code guidance where applicable.
Editorial Review
Reviewed by the Quick Answer Guide Editorial Team
Last reviewed: June 2026
Quick Answer Guide publishes practical, research-based answers to common questions about money, technology, health, travel, home improvement, and everyday life. Content is reviewed using official government resources, educational institutions, industry publications, and other authoritative sources when appropriate. Articles are updated periodically to improve accuracy and usefulness.